7.6.9. Context menu "Base extrude/rotate" or "Cut
extrude/rotate"
7.6.9.7.
Feature attributes...
|  |
| Prev | Next |
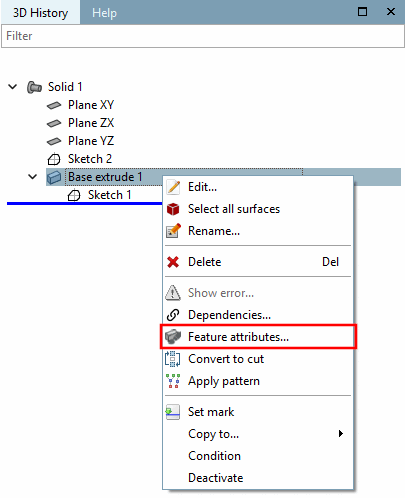
Click on the context menu command Feature attributes.... [Feature attributes...]
-> The area attributes [Face attributes] docking window opens.
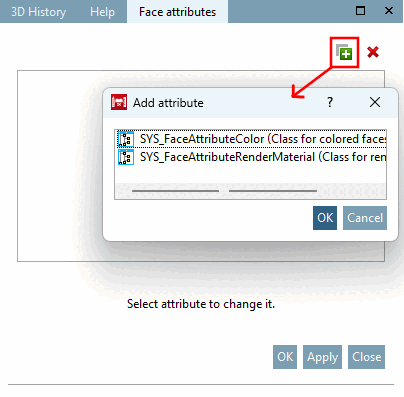
-> The Add attribute dialog box opens.
Set an attribute for color or render material.
(To create render material, see also Section 5.9.2.8.1.2, “ Edit material window for 3D preview ” ).
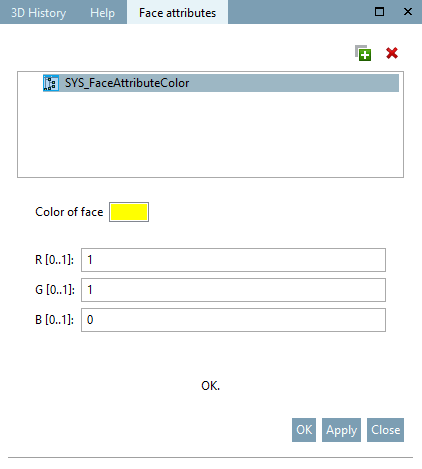
-> The Area attributes [Face attributes] dialog box opens. (In this example, the "Color" attribute was selected).
![[Note]](https://webapi.partcommunity.com/service/help/latest/pages/cn/3dfindit/doc/images/note.png) | Note |
|---|---|
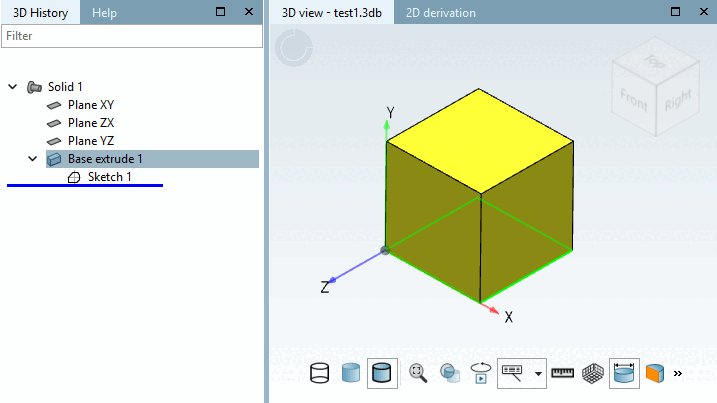
There are several ways to color components. The following sequence also represents the hierarchy. Area color therefore overwrites feature color and component color.
| |
