4.3.4.7. Different use
cases 4.3.4.7.5. Timestamp
ERP_PDM_NUMBER - Dialog PSOL attributes - Material per SAP mask - Return
Mapping
|  |
| Prev | Next |
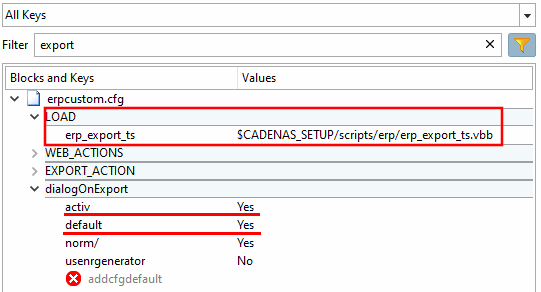
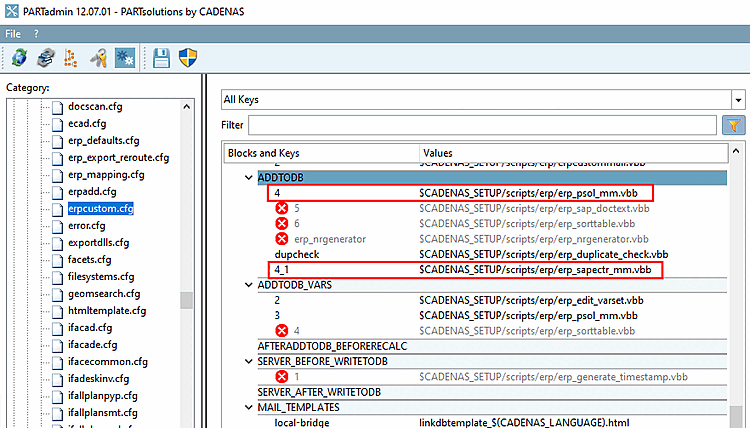
Activate the erp_export_ts key in
erpcustom.cfg> BlockLOAD.To generate the ERP_PDM_NUMBER, activate either the timestamp function or the number generator. See Section 5.14.1, “Creating ERP numbers ”.
Background information: For "clean" workflows the existence of an ERP_PDM_NUMBER is of great importance, as thereby a project line can be clearly identified.
Now directly when clicking the export button an ERP_PDM_NUMBER is automatically created and the line is saved in the link database.
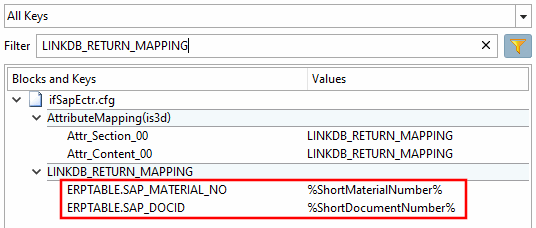
Create the LinkDB columns SAP_MATERIAL_NO and DOCID for PARTdataManager/3Dfindit. See Section 5.3, “Add / remove database columns ”.
Optional: Mark the SAP columns with a corresponding icon
 . See Section 5.11, “
Configure column display - plinkcommon.cfg -> Block [LINKDBFIELDS] -
”.
. See Section 5.11, “
Configure column display - plinkcommon.cfg -> Block [LINKDBFIELDS] -
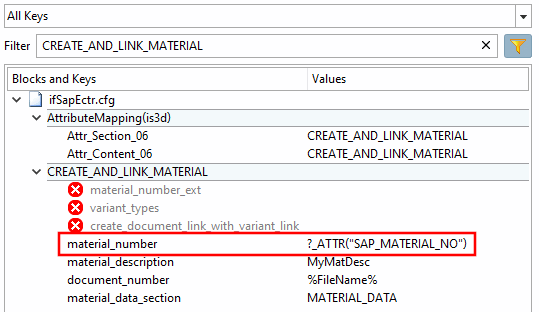
”.Activate the additional function createAndLinkMaterial and let the key material_number point to the column with the SAP number. See also Section 4.3.4.5.2.6, “Create and Link Material ”.
In the previous case the material has been created and linked by the additional task. In this case the additional function is only required for the linking.
Determine which fields should be displayed in the New ID number [new ident-no.] dialog, whether a default value should be entered and whether changes should be possible. See the Section 5.12, “ Design "New ident number " dialog box - erpcustom.cfg -> Block [USERDIALOG] ”. In this example, the material, for example, is displayed in addition to the automatically assigned ERP_PDM_NUMBER.
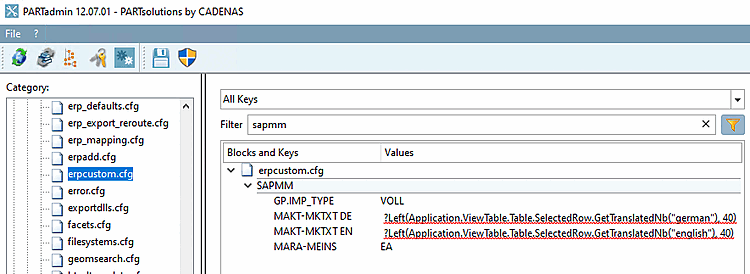
Enter default values for the SAP GUI > Create Material.
The following figure exemplarily shows mandatory values that saving is possible with minimal effort.
Activate return mapping for SAP_MATERIAL_NO and SAP_DOCID. You can find details on this under Return Section 4.2.7, “Return Mapping ”.
Any other fields are possible; only pay attention that respective columns have been created in the LinkDB.
In the configuration file
$CADENAS_SETUP/erpcustom.cfgin the [PlmDocView] block, key enabled, activate the display of the PLMTABLE_DOCVIEW column using the value 1.
![New ident number [new ident-no.] " dialog](https://webapi.partcommunity.com/service/help/latest/pages/cn/3dfindit/doc/resources/img/img_3b67c25759d340148d4284e1d1fa8488.png)
![[Note]](https://webapi.partcommunity.com/service/help/latest/pages/cn/3dfindit/doc/images/note.png)
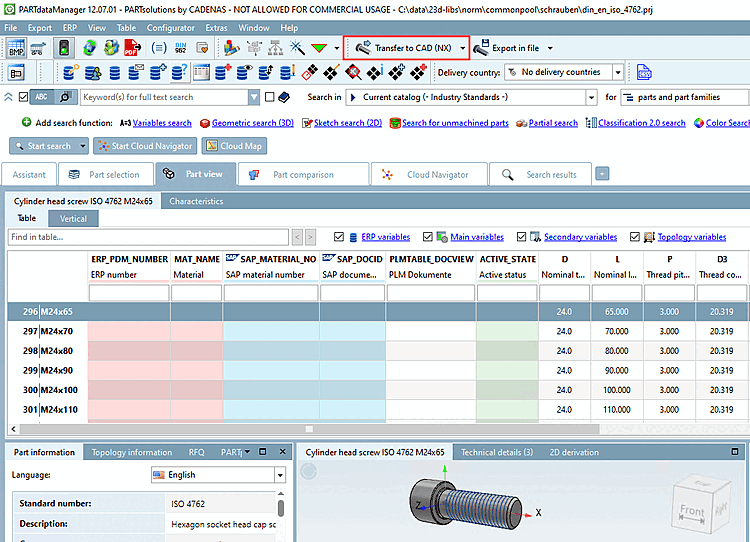
Select the desired table row in PARTdataManager select the desired table row and click on Transfer to CAD to perform a part export.
You can use 3Dfindit just as well. Installation instructions can be found above.
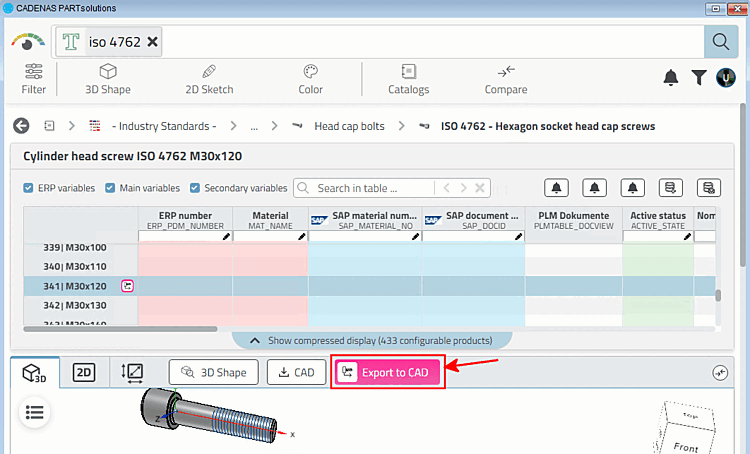
Select the desired table row in 3Dfindit and click on the button.
-> The New ident number [new ident-no.] dialog opens. (You can set whether fields are to be filled during the export and if so, which ones)
In this example, a material must be selected.
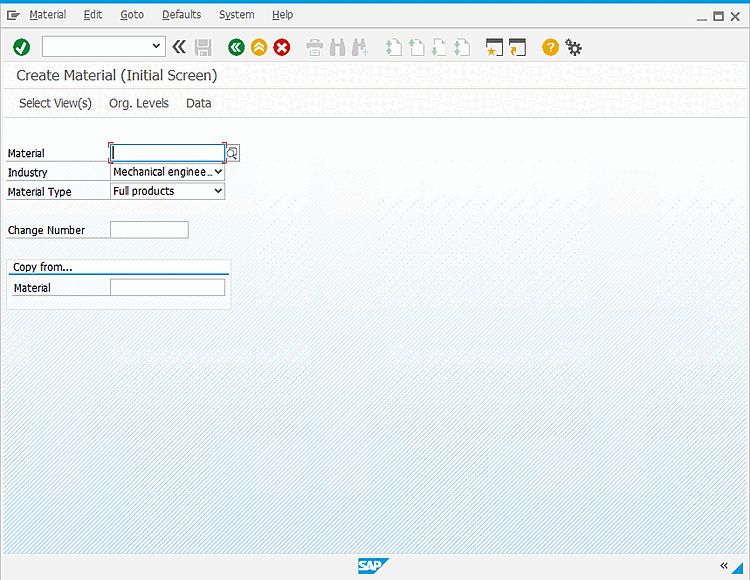
-> The SAP GUI Create Material screen (initial screen) opens.
In this example, the mandatory fields have been filled in automatically.
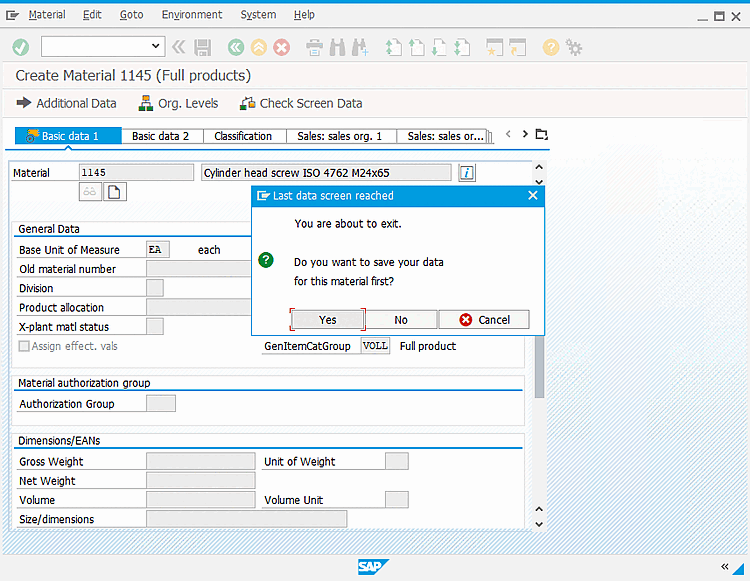
The input mask for basic data is opened.
The mandatory fields were also filled in automatically here.
Save the entries by clicking on .
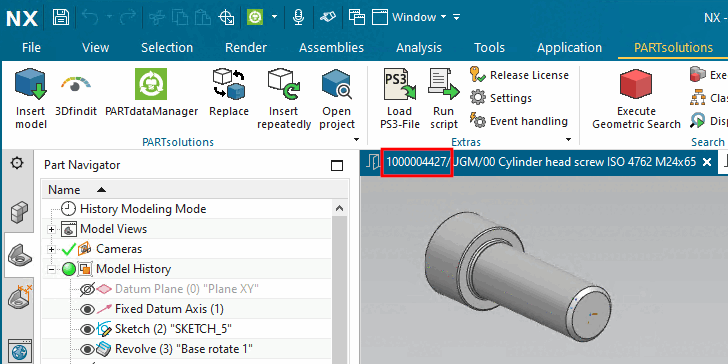
-> The document is checked in to PDM.
-> The document is opened in CAD. The file name displayed contains the document ID (SAP_DOCID).
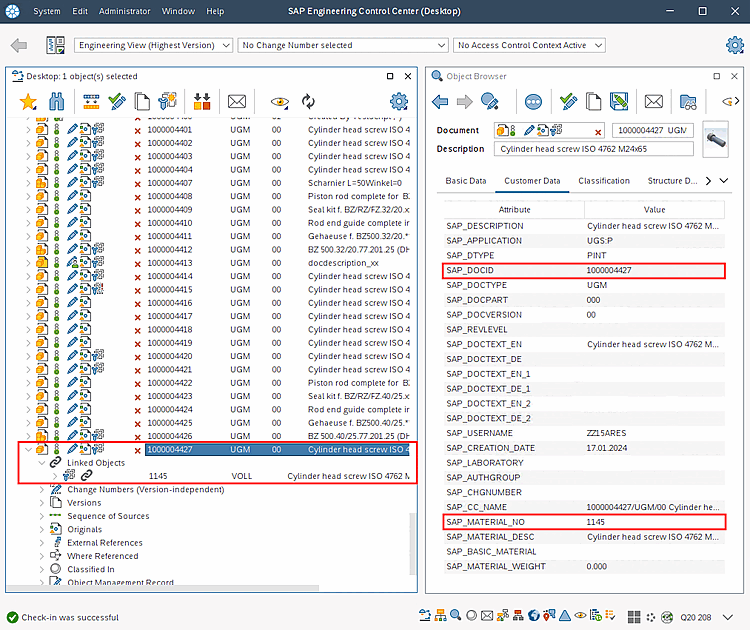
-> The material number SAP_MATERIAL_NO is displayed under Linked Objects.
-> SAP_MATERIAL_NO and document ID SAP_DOCID are displayed in the Object Browser.
Change to PARTdataManager or 3Dfindit.
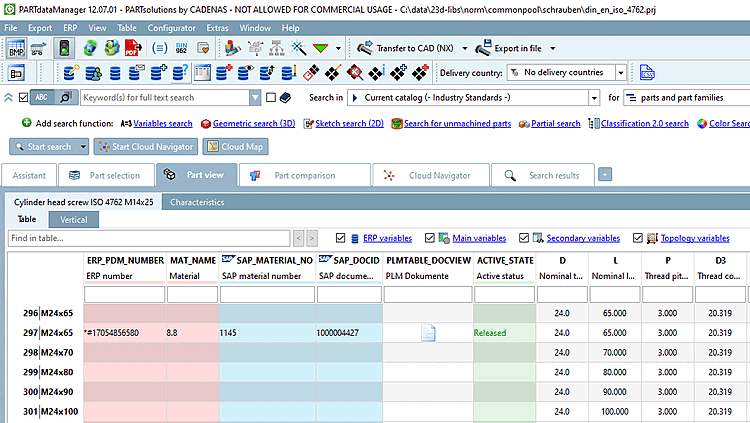
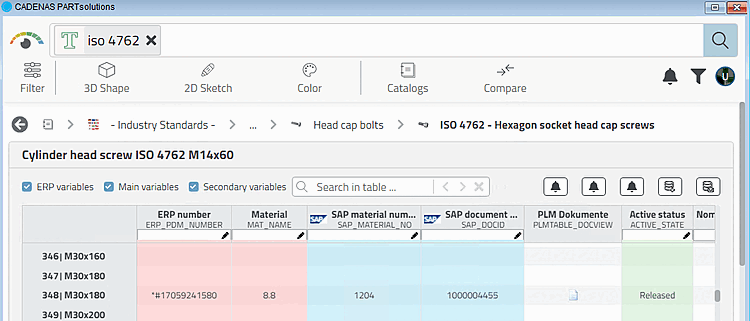
-> PSOL ERP number (with timestamp), Material (optional), SAP material number and SAP document ID have been entered automatically.
Optional: Click on the button
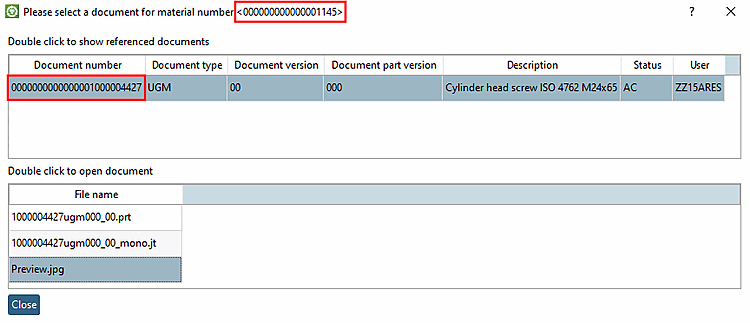
 Display SAP document data [Show SAP document data].
-> A dialog showing the documents linked in SAP ECTR related to the currently selected material is opened.
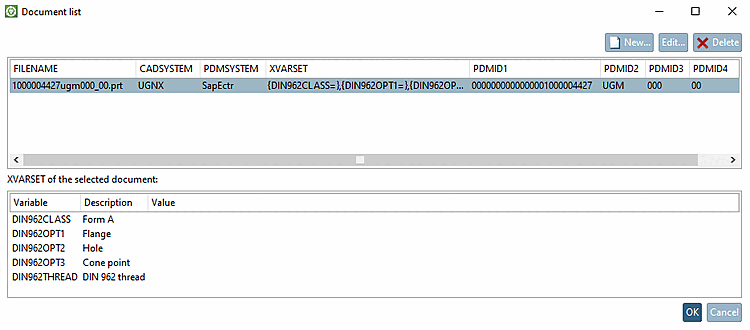
Optional: In the PARTdataManager Characteristics table, click on the document symbol
 .
.-> You can see the link between document and PSOL and the entries in PLMTABLE2.
![PARTdataManager new Ident Number [new ident-no.] " dialog](https://webapi.partcommunity.com/service/help/latest/pages/cn/3dfindit/doc/resources/img/img_b42216c992594f34bfc077fa71065304.png)
![3Dfindit: "New ident number [new ident-no.] " dialog](https://webapi.partcommunity.com/service/help/latest/pages/cn/3dfindit/doc/resources/img/img_735829a5d56b49be825d6ee714766184.png)