New project creates a new project within the selected directory.
Mark the desired folder under which you want to create the new project.
Click on the New project context menu command.
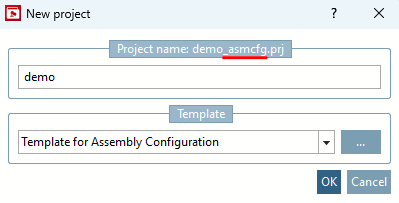
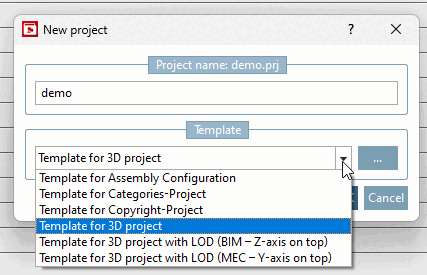
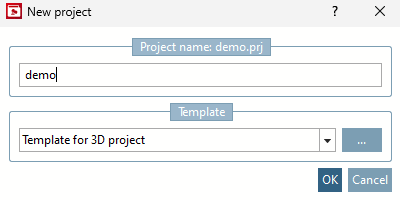
→ The New project dialog box opens.
Enter the desired name for the project [Project name] under Name [Project name].
Select the desired template [Template] in the list field below:
Template for 3D project (standard template for 3D projects)
Template for assembly configuration [Template for Assembly Configuration] (standard template for assembly configuration)
→ The corresponding base files are created.
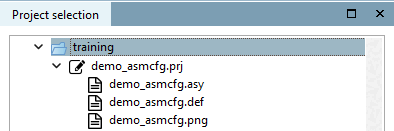
Select
*_asmcfg.asyand click on or click on the context menu command Open with PARTdesigner [Open with PARTdesigner] at project level.→ The configuration is opened in PARTdesigner. See Section 7.13, “Docking window "Configurator " / "Assembly "”.
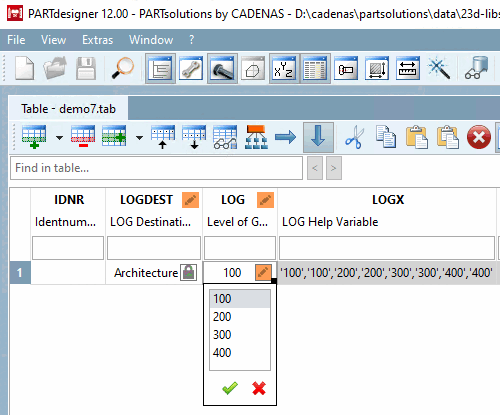
Template for 3D project architecture with LOG (Z-axis above) (LOGDEST variable with default architecture [Architecture] as target market)
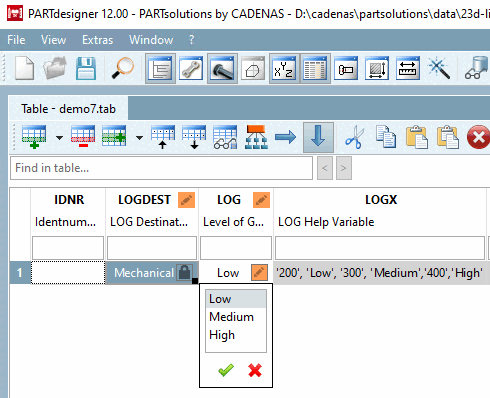
Template for 3D project mechanical engineering with LOG (Y-axis above) (LOGDEST variable with default mechanical engineering [Mechanical engineering] as target market)
By selecting one of these two templates, basic variables for LOG control are automatically created with corresponding values. Basically, if you want to provide a model several times in different levels of detail, select one of these templates (target market architecture [Architecture] or mechanical engineering [Mechanical engineering] ).
For details, see Section 5.9.4.3.5, “Example: Specifics for project creation especially in Architecture / BIM catalogs ”.
Alternatively, you can use the Browse button to specify the template (the storage folder for templates is
$CADENAS_SETUP\prjtmpl\default.)Template for Categories [Template for categories project] project: See Section 5.12.3.7, “Classification (By Categories) - (By Countries) - (By Functionality)” and Section 3.2.15, “ Classification by Category / Alphabet / Country ”.
Template for copyright project [Template for copyright project]: See Section 3.2.19, “ Copyright Project ”.
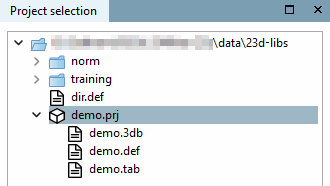
→ The new project is transferred to the directory tree with base files.
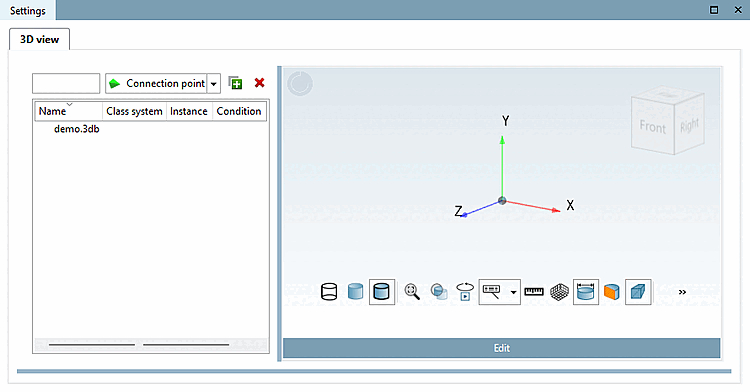
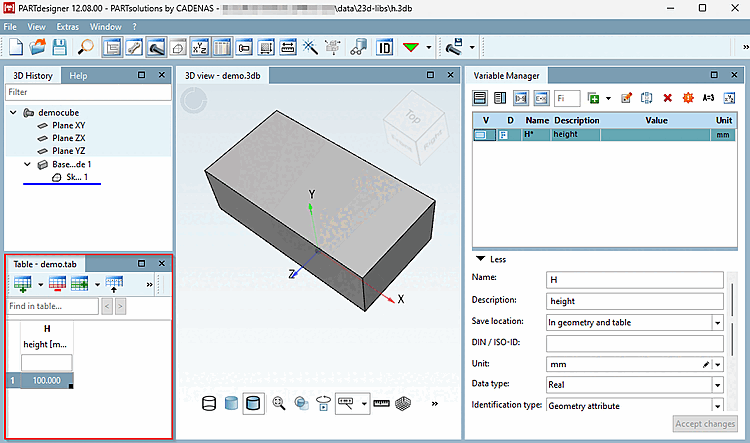
*.3db: After selection, an empty 3D preview is displayed under Edit project. Use to open PARTdesigner to create the 3D model. See Chapter 7, PARTdesigner .
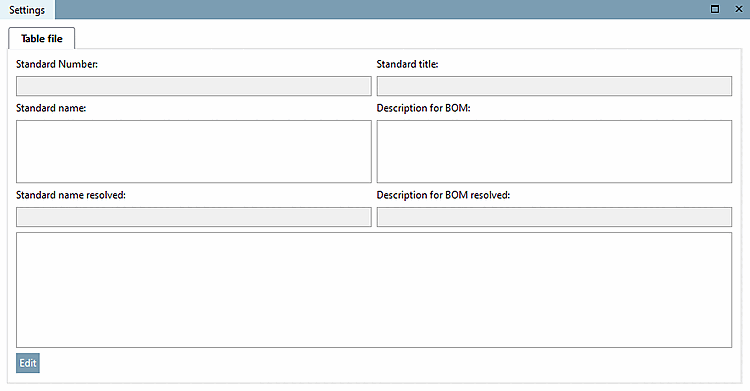
*.tab: After selection, empty project details are displayed under Edit project. Use to open PARTdesigner to create the characteristic attribute table. See Chapter 7, PARTdesigner .
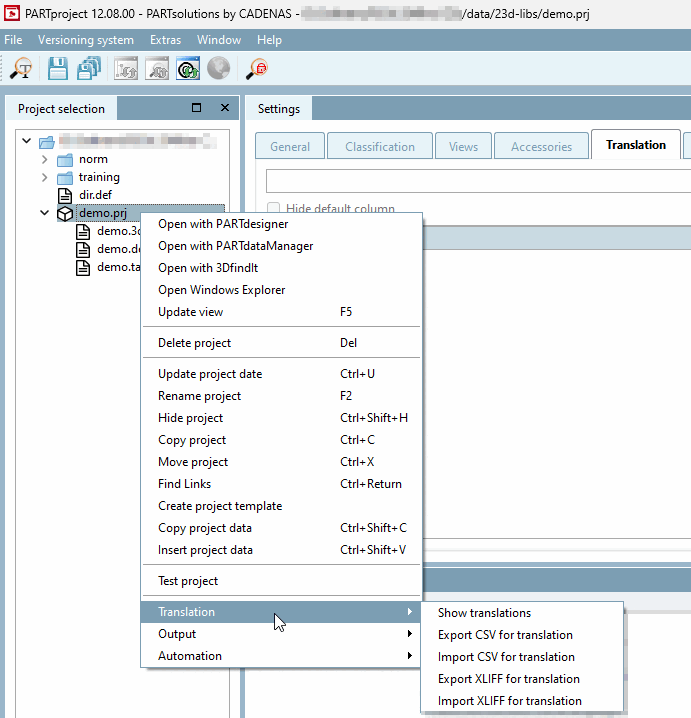
*.def: Translation file, PARTproject opens the Translation tab page.
To create and evaluate translations, use the Translation context menu command in the project file. See Section 5.8.2.1.18, “ Translation ”.
![[Note]](https://webapi.partcommunity.com/service/help/latest/pages/cn/partsolutions_user/doc/images/note.png)