The following explains how to add database columns with PARTlinkManager.
Log into the database under File menu -> Connect.
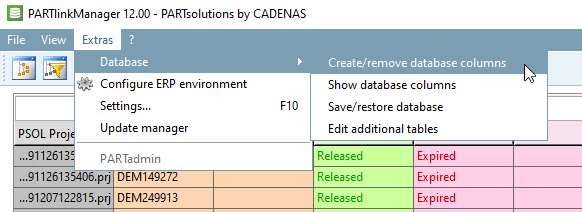
Select in PARTlinkManager -> Extras menu -> Database -> Change/create database columns [Modify/create database columns].
-> The Create/remove database columns dialog box opens.
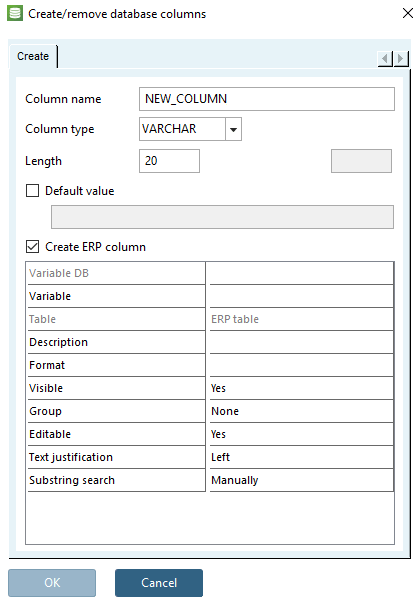
Select a column type in the list field:
VARCHAR (variable character length is often better than CHAR to avoid problems), CHAR, SMALLINT, INT, DECIMAL
A character string length must also be specified for text fields
If you want to edit the column in the PARTlinkManager in the Configure column display [Modify column display] dialog box (i.e. not only create it in the database itself, but also enter it in the corresponding configuration files), check the box. This is the recommended procedure.
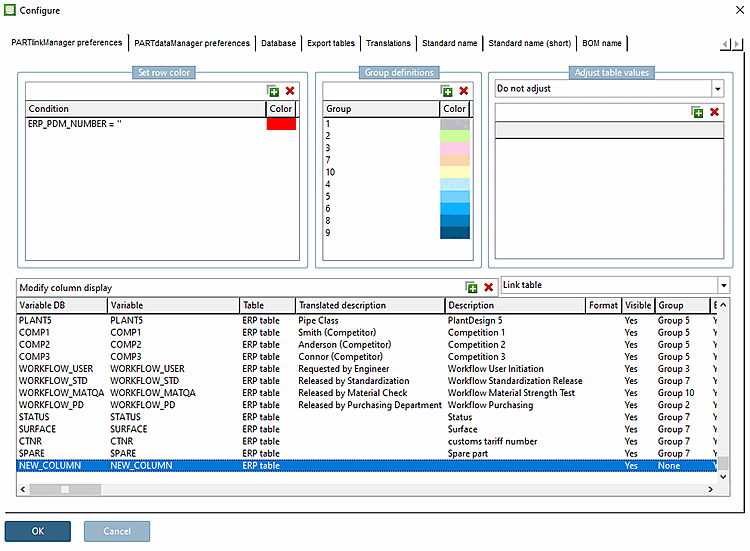
Open the Configure dialog box via Tools [Extras] menu -> Configure ERP environment.
The column you have just created is displayed in the Configure column display [Modify column display] dialog area.
![[Note]](https://webapi.partcommunity.com/service/help/latest/pages/cn/3dfindit/doc/images/note.png)