
To be able to import data from third-party systems in the form of a CSV file, the columns in the link database must be available in the same way.
The following description shows how to add any additional columns to the standard configuration.
The columns ERP_PDM_NUMBER, MAT_NAME and DESCRIPTION are created with the standard installation.
The LinkDB database instance consists of several tables. Three columns are created in the ERPTABLE by default:
Any number of additional columns can be created in the ERPTABLE to record the third-party system information.
sql_execute create table ERPTABLE (/
ERP_PDM_NUMBER varchar (50) not null,/
DESCRIPTION varchar (200),/
MAT_NAME varchar (100),/
primary key (ERP_PDM_NUMBER))
sql_execute create public synonym ERPTABLE for SYSADM.ERPTABLE
sql_execute grant all on ERPTABLE to PUBLIC
Detailed information on the database structure can be found under Section 5.2, “Installation Link database ”.
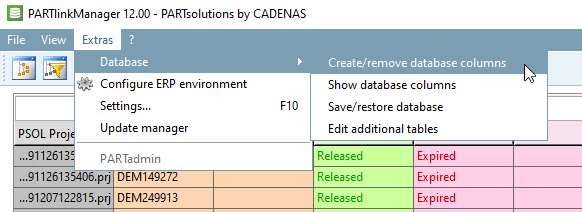
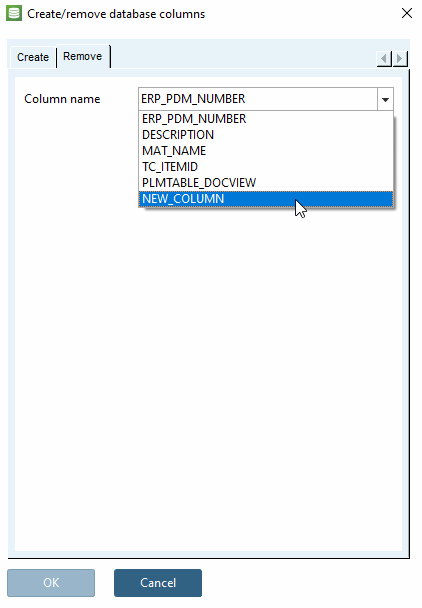
The following explains how to add database columns with PARTlinkManager.
Log into the database under File menu -> Connect.
Select in PARTlinkManager -> Extras menu -> Database -> Change/create database columns [Modify/create database columns].
-> The Create/remove database columns dialog box opens.
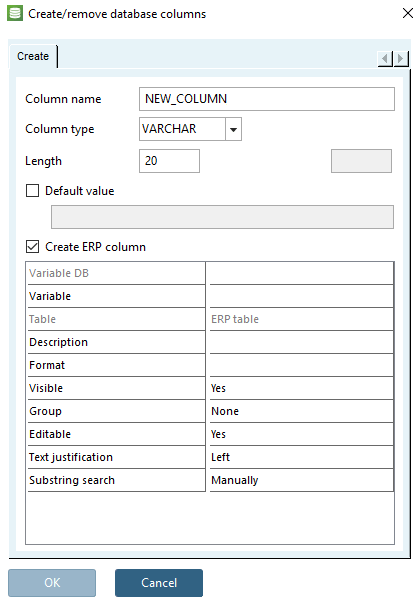
Select a column type in the list field:
VARCHAR (variable character length is often better than CHAR to avoid problems), CHAR, SMALLINT, INT, DECIMAL
A character string length must also be specified for text fields
If you want to edit the column in the PARTlinkManager in the Configure column display [Modify column display] dialog box (i.e. not only create it in the database itself, but also enter it in the corresponding configuration files), check the box. This is the recommended procedure.
Open the Configure dialog box via Tools [Extras] menu -> Configure ERP environment.
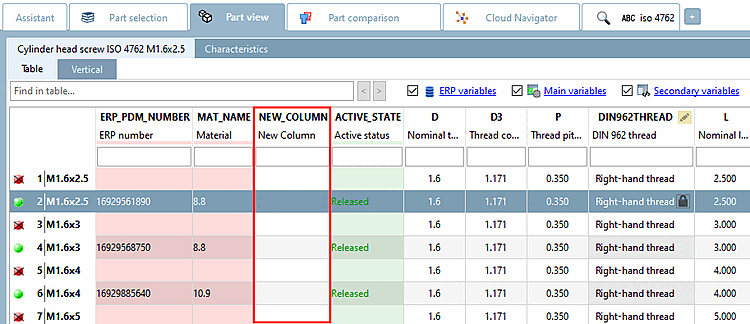
The column you have just created is displayed in the Configure column display [Modify column display] dialog area.
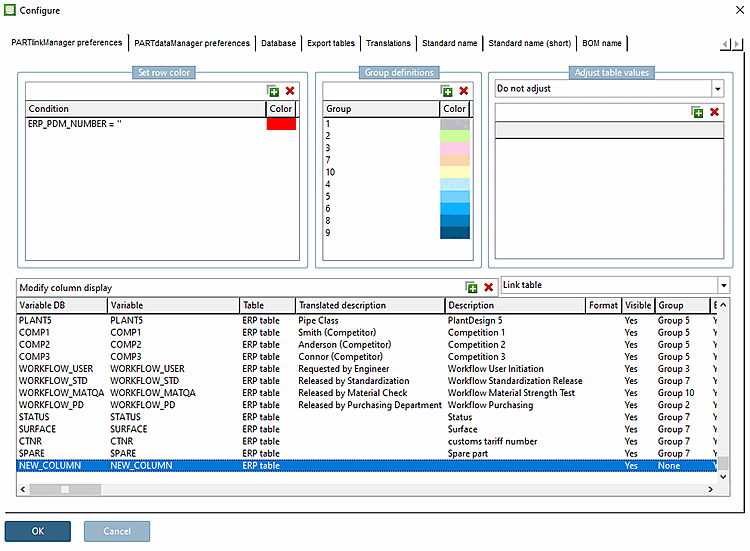
For the column to be displayed in the PARTdataManager column is displayed, two conditions must be met:
Under Configure column display [Modify column display], the corresponding column must be set to Yes under Visible.
In the Variable [Variable DB] DB columns and Variable columns, the assigned column name is displayed.
The entry under Variable DB is fixed.
The entry under Variable can be adjusted if necessary.
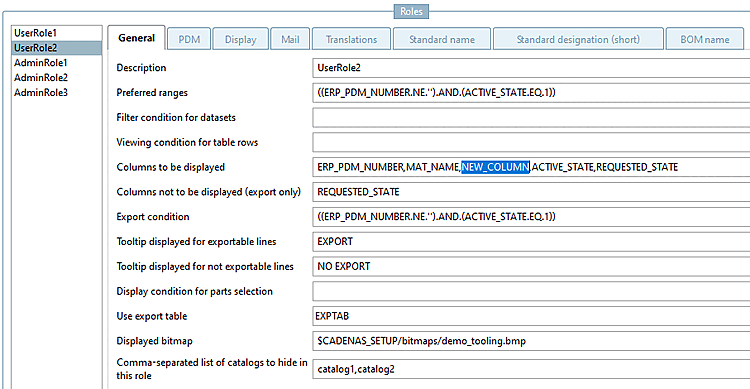
In PARTadmin, the column must be entered in the desired role(s) under Columns to be displayed.
-> A message appears stating that the link database index should be regenerated if the column is to be included in the search.
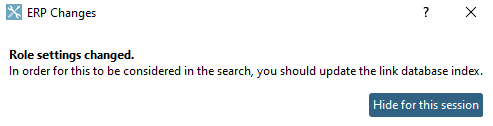
See Section 1.4.3.6.6.4, “LinkDB search index ”.
![PARTadmin -> Index management [Index administration]](https://webapi.partcommunity.com/service/help/latest/pages/cn/3dfindit/doc/resources/img/img_6731c4fda3ed464584250180b5b91015.png)
![[Note]](https://webapi.partcommunity.com/service/help/latest/pages/cn/3dfindit/doc/images/note.png) | Note |
|---|---|
If the database does not support the deletion of columns (e.g. SQLite), the Remove tab page is hidden. The database is not accessed! The deletion only applies to ENTERPRISE 3Dfindit data. | |