
After you have called up the Replace menu in 3Dfindit, the dialog of the same name appears in CoCreate Modeling.
Click the part to be replaced.
→ The part is entered in the Part dialog box.
If you want to replace all instances of this part in the assembly, activate the All parts checkbox.
If you want to replace individual additional instances of this part, add them in the Selection input field. To do this, click the Selection button and then the desired part. The selected parts are inserted in the field one after the other.
Finally confirm your selection with the green checkmark.
→ The view changes to PARTdataManager. (The standard process is described at Section 3.5.6, “ Replace ”.)


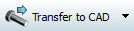
In PARTdataManager select the replacement part and click Transfer to CAD
 .
.
→ The previously selected parts are replaced in CoCreate Modeling.