
![[Note]](https://webapi.partcommunity.com/service/help/latest/pages/cn/ecatalogsolutions/doc/images/note.png) | Note |
|---|---|
The Classify projects in batch run [Batch classification of projects] function described here and the Add projects to classification function have certain application overlaps.
| |
You can use the Classify projects in batch run [Batch classification of projects] plugin ( "Customize order number and type code " plugin in older versions) to successively assign the desired variable to projects for a selected class characteristic.
You select a variable. The plugin runs through the whole structure and assigns the classification to all projects containing the variable.
Afterwards a listing will show for which projects the assignment has been successful and for which not. In a next step now you can use another variable for assigning as long as all projects are classified accordingly.
The files attribute_classification.cfg, attribute_classification.def and attribute_classification.vbb must be available in the plugin directory ($CADENAS/libs/all/plugins) must be present.[51]
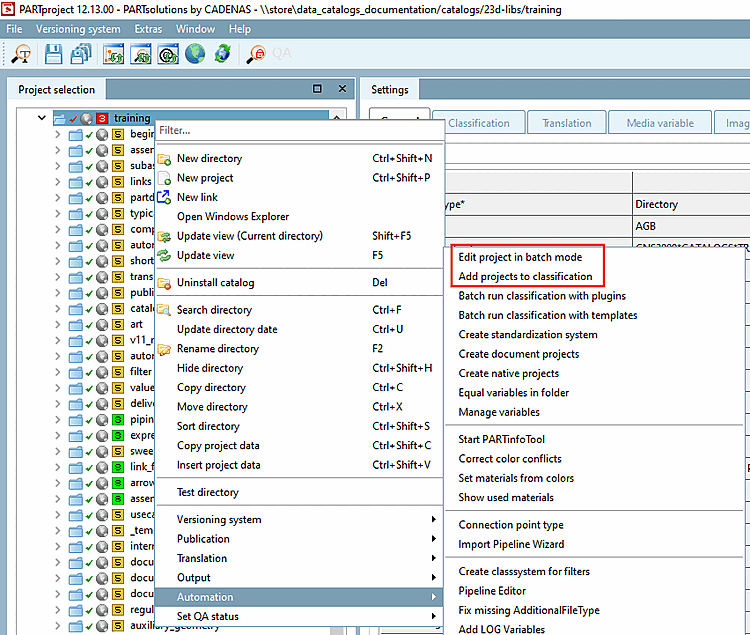
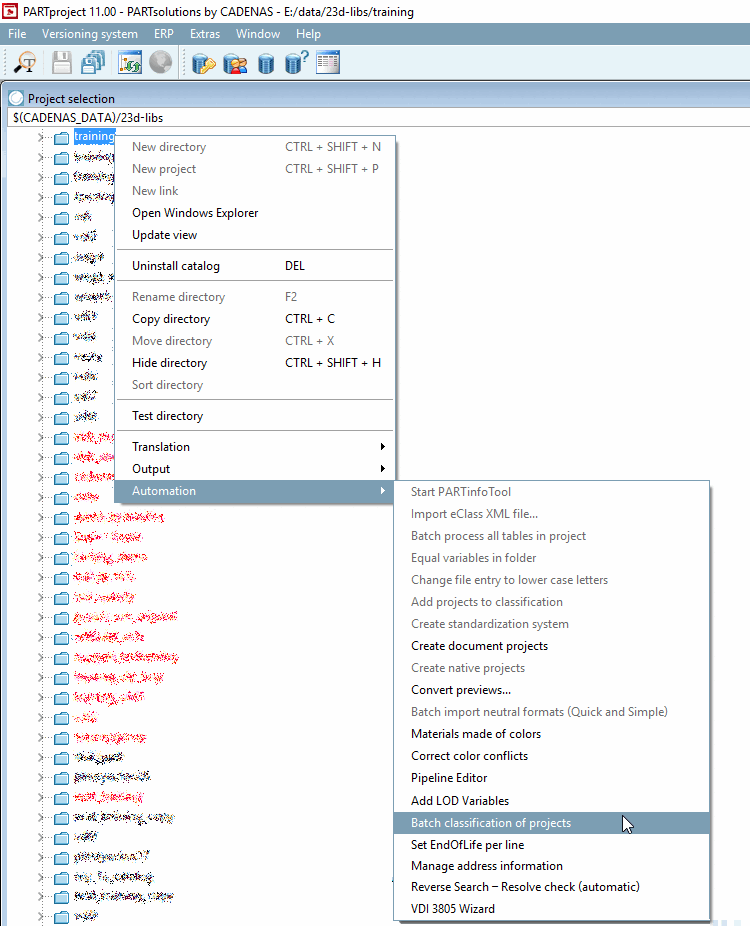
In PARTproject under Project selection, select the desired directory level (catalog main directory or any other directory) and then start the plugin under Automation -> Classify projects in batch run [Batch classification of projects].
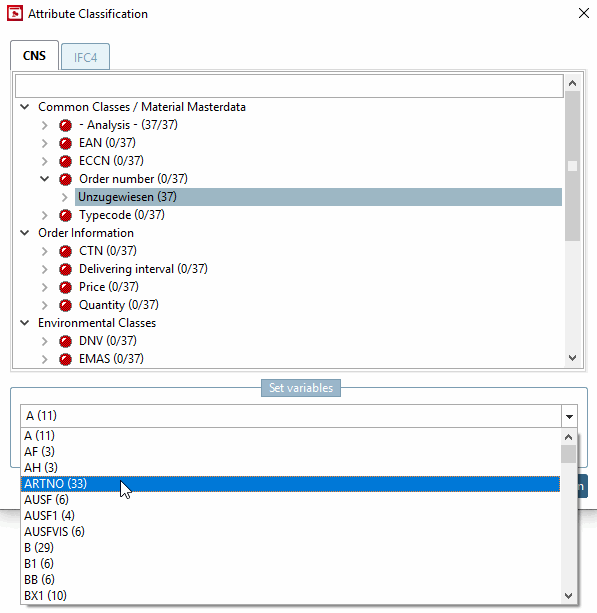
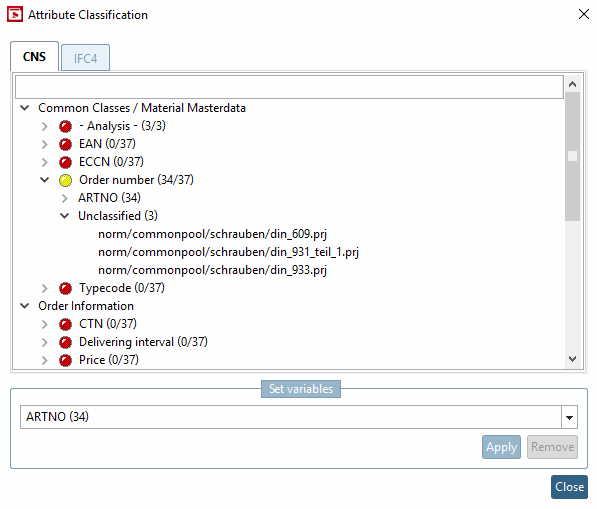
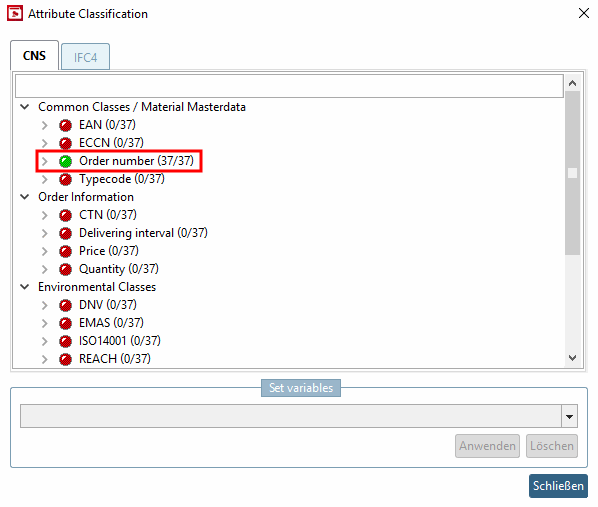
Select the Unassigned [Unclassified] line in a group below the desired class characteristic (here in the example Order number ).
Expand the list field under Set variables and select the variable that contains the corresponding value for the selected class characteristic (here "ARTNO").
The number in brackets identifies the amount of projects which contain the variable. If the number of projects is very big so that it cannot be detected within 5 seconds, no value is displayed.
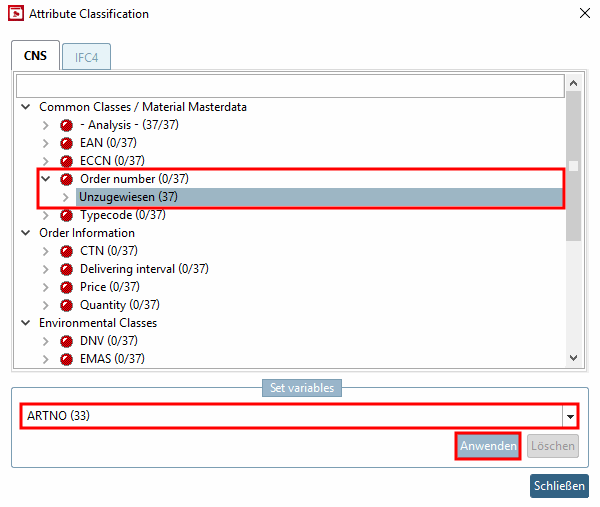
-> All projects containing the set variable are classified accordingly. (The process of assigning may last a moment.)
In this example, now the status light is showing yellow, because not all projects could be classified (because the column "ARTNO" has not been available or another variable does contain the article number or it's about a link project).
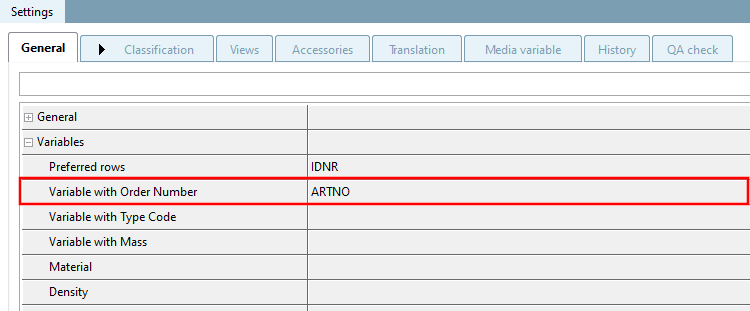
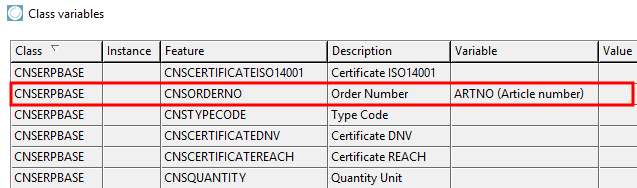
-> The variable is automatically entered in the Variable with order number field or in the Class variables in dialog.
Edit project -> General tab -> Classification menu item -> Characteristics (CNS) -> Class variables dialog
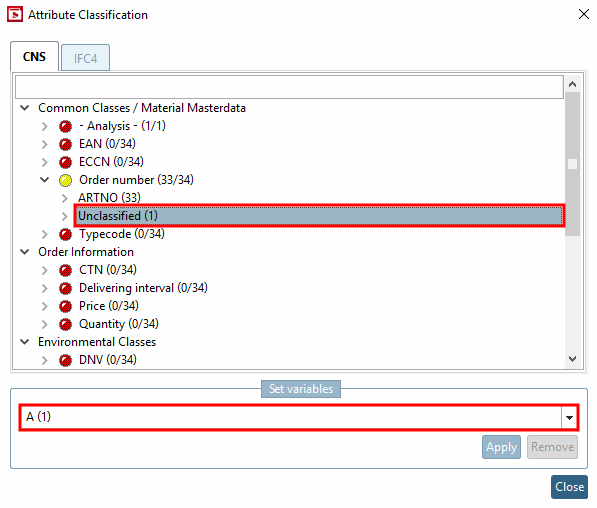
Select another variable for the projects that have not yet been assigned and click again.
Once all projects found for the selected class attribute are classified, the status light becomes green.
![[Tip]](https://webapi.partcommunity.com/service/help/latest/pages/cn/ecatalogsolutions/doc/images/tip.png)
The dialog can be adjusted in the configuration file attribute_classification.cfg:
The CNS classification is displayed as standard. Any other classifications can be added (see below).
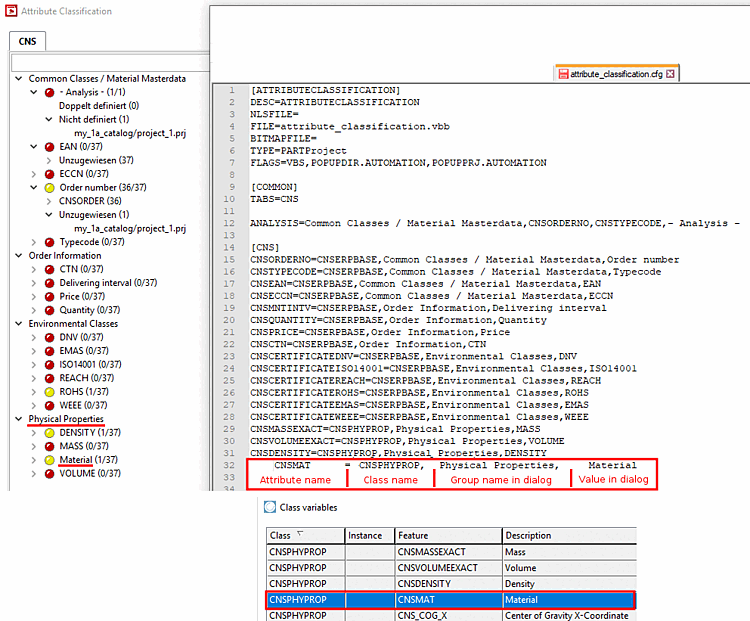
Extend dialog for other classifications
For this, under "TABS" enter a further classification separated by comma and create a block with the same name.
[COMMON]
#TABS=CNSERPBASE,CNSPHYPROP,CNSSPECPROPARC
TABS=CNS,IFC4
ANALYSIS=Common Classes / Material Masterdata,CNSORDERNO,CNSTYPECODE,- Analysis -

[CNS]
CNSORDERNO=CNSERPBASE,Common Classes / Material Masterdata,Order number
CNSTYPECODE=CNSERPBASE,Common Classes / Material Masterdata,Typecode
...
...
[IFC4]
IFC4_IFCADDRESSTYPEENUM=IFC4_IFCADDRESS,Gruppenname1,Wert1
IFC4_IFCTEXT=IFC4_IFCADDRESS,Gruppenname2,Wert2
IFC4_IFCLABEL=IFC4_IFCADDRESS,Gruppenname3,Wert3
In the Analysis group, a special evaluation is carried out for the ORDERNO (order number [Order number] ) and TYPECODE (type code [Type code] ) characteristics for the entire classification.
| Note |
|---|---|
Each project must have classified at least one of the two and not the same variable may be used. If no errors are found, the point - Analysis - is not displayed. | |
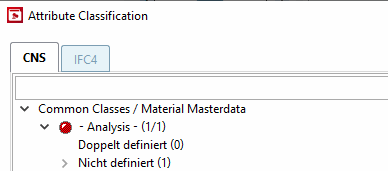
ORDERNO leer TYPCODE leer Fehler,“Not defined“ ORDERNO auf Spalte BESTNR TYPECODE leer Ok ORDERNO leer TYPECODE auf Spalte CODE Ok ORDERNO auf Spalte BESTNR TYPECODE auf Spalte CODE Ok ORDERNO auf Spalte BESTNR TYPECODE auf Spalte BESTNR Fehler, „Double defined“