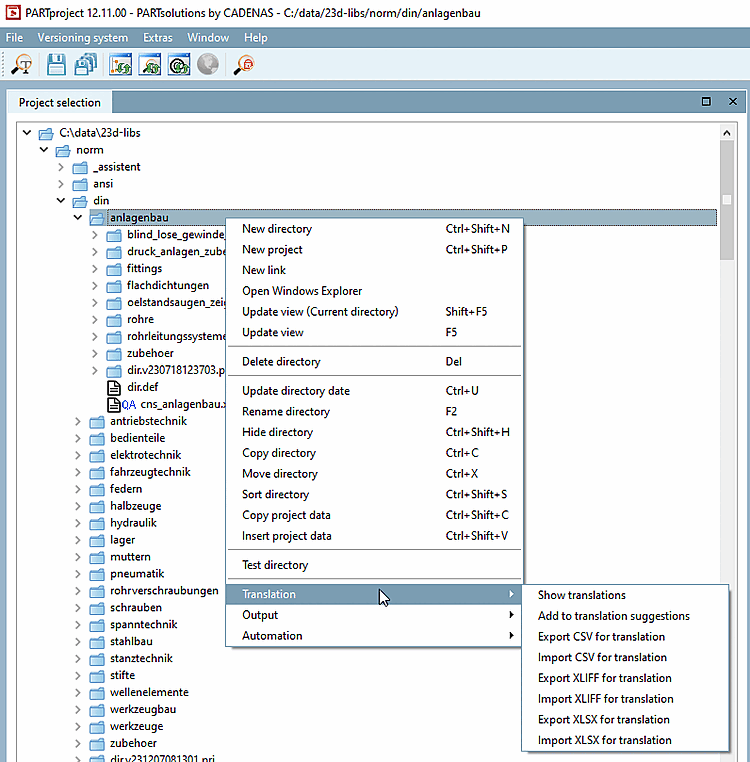
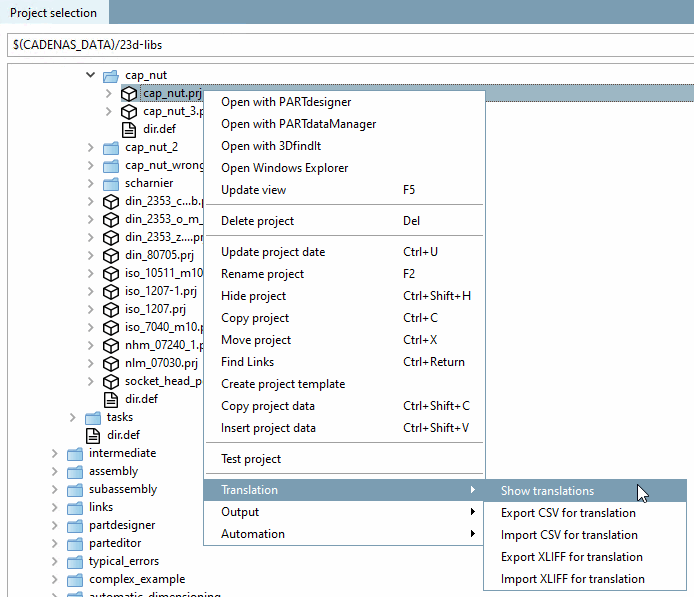
Click on the context menu command Show translations to list all translations of the selected directory or project in the Compare files [compare files] dialog box.
In the Compare files [compare files] dialog, you can see which terms have been translated differently.
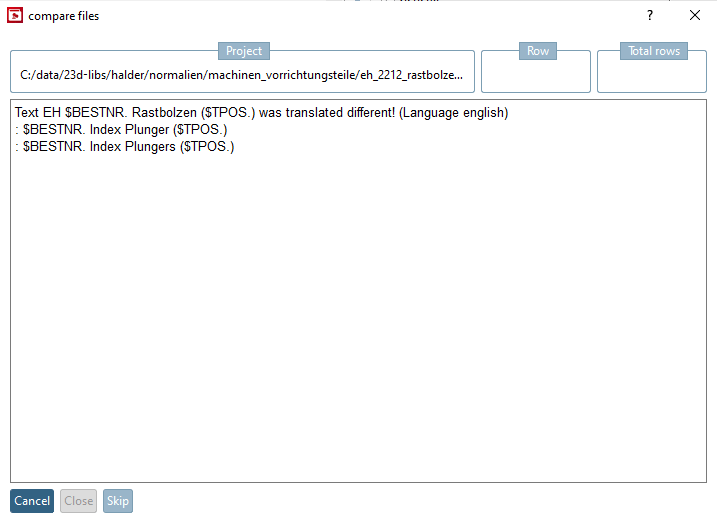
Click on to open the Translation dialog box.
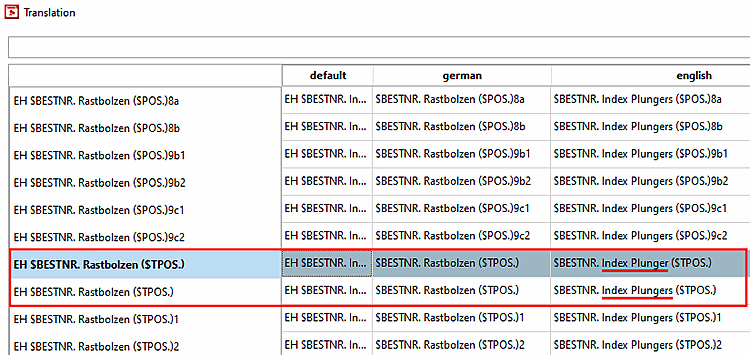
![[Tip]](https://webapi.partcommunity.com/service/help/latest/pages/cn/ecatalogsolutions/doc/images/tip.png) | Tip |
|---|---|
Sort the terms according to the source language and widen the columns. Then you will find different translations quickly. | |
As soon as the comparison is complete, the Translation dialog page is displayed.
Meaning of the buttons at the top right
 : Spell Checker
on/off [Spell check on/off]: Misspelled words are marked with a red
line, if these are not known to the dictionary.
See also Section 5.8.2.1.18.2, “Spell check in the Translation tab”.
: Spell Checker
on/off [Spell check on/off]: Misspelled words are marked with a red
line, if these are not known to the dictionary.
See also Section 5.8.2.1.18.2, “Spell check in the Translation tab”. : To
Add translation suggestions [Add to translation suggestions]: The button adds all
translations of the current page to the (internally managed)
translation suggestions. These can then be accessed by
Context menu command Apply Suggestion / Suggestions
can be accessed. [Use suggestions] [Accept suggestion]
: To
Add translation suggestions [Add to translation suggestions]: The button adds all
translations of the current page to the (internally managed)
translation suggestions. These can then be accessed by
Context menu command Apply Suggestion / Suggestions
can be accessed. [Use suggestions] [Accept suggestion]
 : Source: See
below.
: Source: See
below.
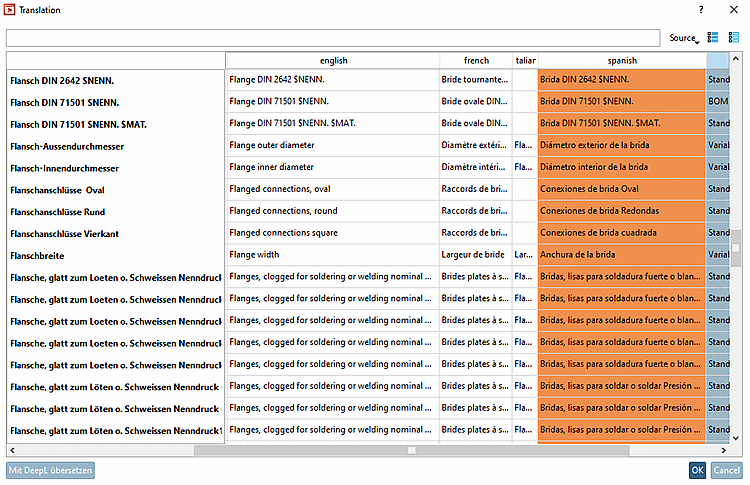
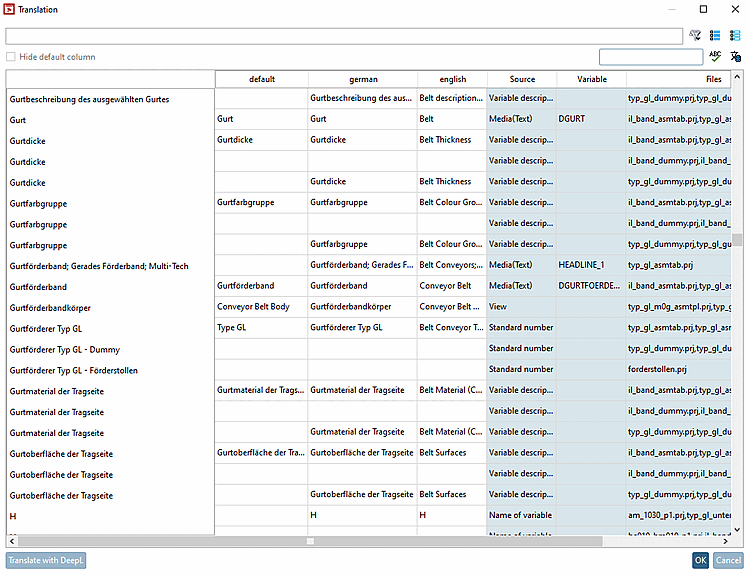
Meaning of the individual columns
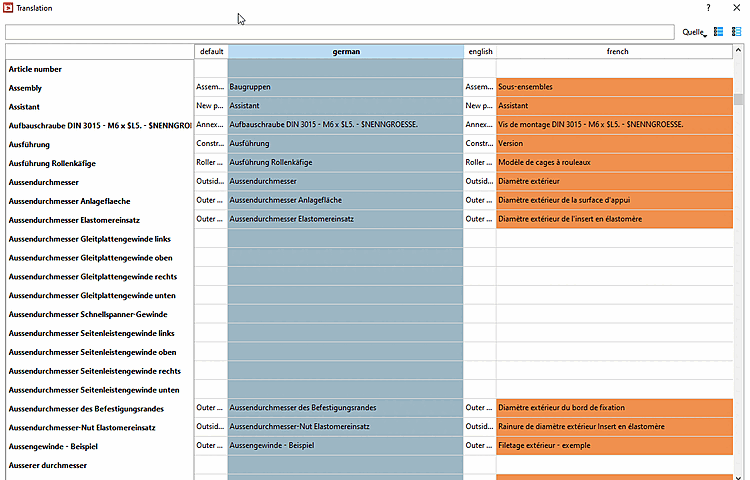
The column on the far left lists the original terms, i.e. those created when the project was created (internal identifier).
The language version used if no language is selected (generally English) is saved under default [english].
In the remaining columns, terms can be translated into the respective language.
The number of languages displayed depends on the entry under the tab page General -> Catalog settings [Settings for the catalog] -> Catalog available in the languages. See Section 5.9.2.4, “Menu item: Catalog settings (display at catalog level) ”.
The source of [Source] the respective term is displayed on the far right, e.g. standard designation [Standard name], parts list designation [BOM name], project value [Project value], etc.
If you open the Source list field at the top right, you can explicitly specify the desired sources.
In the case of media variables, there are entries in the Variable column. In this case, the entry in the Source column is "Media(Html ) [Media(Html)] " or "Media(Text) [Media(Text)] ".
Simply drag the column with Drag and Drop to the desired position.
Click on the drag point between the columns and drag the width to the desired position.
Manual filling of a table cell:
Simply click into the respective field and insert the desired term.
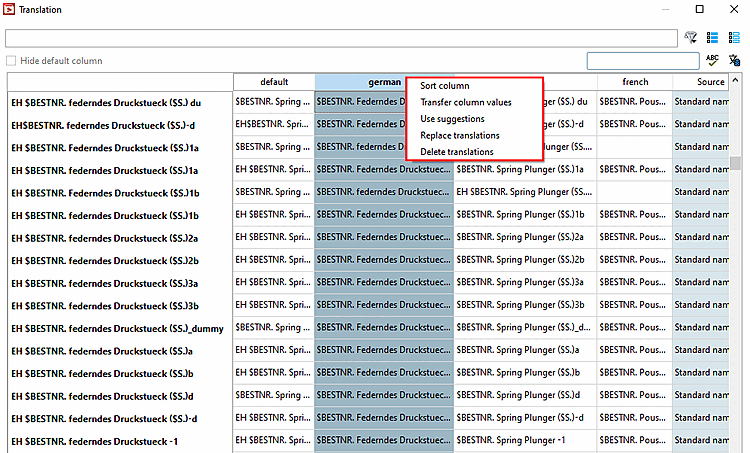
Context menu commands in the column header:
Sort column: Sorting takes place according to the selected column.
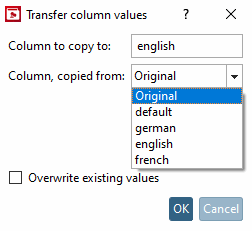
Transfer column [Transfer column values] values:
In the dialog box of the same name, select the source language (column from which you want to copy [Column, copied from] ) and the target language (column to which you want to copy [Column to copy to] [default is the language of the selected column]).
If you want to overwrite existing values, also activate the Overwrite existing values radio button.
Adopt suggestions [Use suggestions]:
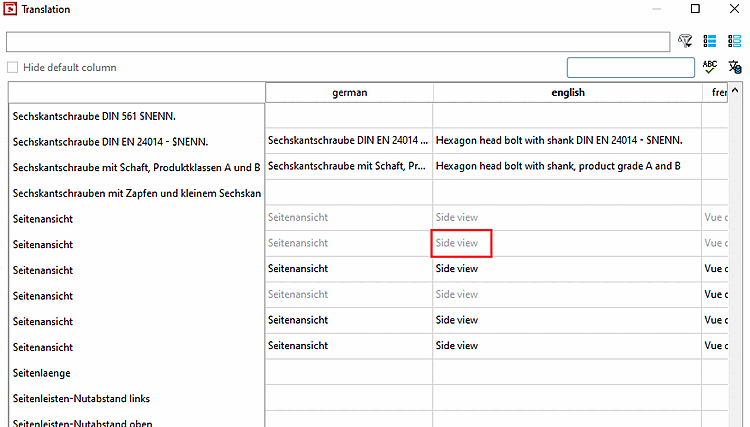
The expressions in grayed-out text are already created/existing translations that are used within other directories and that have been "remembered" PARTproject they are merely suggestions and can either be overwritten or permanently entered using the context menu command Accept suggestion [Accept suggestion] (for a single field) or Accept suggestions [Use suggestions] (for an entire column).
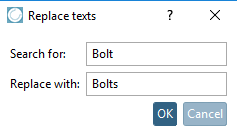
In the Replace texts dialog box, you can search the currently selected column for a specific term and replace it with another term.
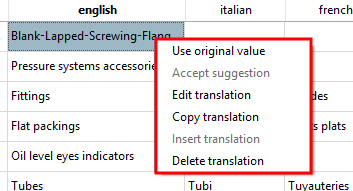
Context menu commands in the individual cell:
Adopt [Use original value] original valuethe value from the "Original column" (1st column on the left) is copied.
Accept [Accept suggestion] proposal:
If a text has already been translated before (meaning in another project), it is suggested with grayed out color in the cell.
The text is then transferred to the project and displayed in black with Accept proposal [Accept suggestion].
Call the context menu command over the translation target language.
In the case of media variables "Media(Html) [Media(Html)] ", HTML can be used and the dialog window contains the Text view and HTML view tab pages.
Select the desired tab page on the left under Translated languages.
Translate on the right in the Translate to input field: <target language>.
Copy translation: Copies the current value to the clipboard.
Paste translation [Insert translation]: Pastes the copied value into the desired cell.
Translate with DeepL: [Translate with DeepL] Use the integrated translation service.


![Translate [Translation] " dialog box](https://webapi.partcommunity.com/service/help/latest/pages/cn/ecatalogsolutions/doc/resources/img/img_94448db99102479f9c0ab2b6c9b336f3.png)
![Translate [Translation] " dialog box in the case of media variables](https://webapi.partcommunity.com/service/help/latest/pages/cn/ecatalogsolutions/doc/resources/img/img_1a6c9a084d5c4108b9cc187764887868.png)
Translation with DeepL is subject to a charge. You need an authentication key [Authentication-key].
In the index tree, select the desired level (catalog | directory | project).
Click the context menu command Translation -> Show translations.
Click on the button. (If the button is grayed out, the selected area is read-only)
-> The respective dialog is opened.
Target languages: Select one or more languages using the checkbox.
Glossary (optional) [Glossary (optional)]:
If you have created your own glossary, you can also make it available for the DeepL functionality. Simply enter the glossary ID [Glossary ID].
Terms that appear in the glossary are translated accordingly; terms that are not included there are still translated using standard functionality.
If the option Automatic language detection by DeepL (per field) [Automatic language recognition by DeepL (per field)] is activated, the Glossary ID field appears grayed out and the translation is only carried out using the standard functionality.
Restrict translations: Determine which types are to be translated.
-> Translated terms are marked in orange.
-> $xyz variables are not to be translated.
-> Exactly same terms are only translated once by DeepL and then distributed to related cells.
Check the single translations. You can manually correct anytime.
If translations are missing, select a different source language [Source language] or the option Replace empty fields with internal identifiers.
Finally, confirm with . Only then will the translated terms be saved.
![Dialog "Translate with DeepL [Translate with DeepL] "](https://webapi.partcommunity.com/service/help/latest/pages/cn/ecatalogsolutions/doc/resources/img/img_4a7859830ee243e7b0757da2f20a1788.png)