1.6.2.
Insert from the standard and purchased parts library via "PARTdataManager" 1.6.2.2.
"In cylinder bore "
|  |
| Prev | Next |
![[Note]](https://webapi.partcommunity.com/service/help/latest/pages/cn/partsolutions_user/doc/images/note.png)
Once you have clicked the Transfer to CAD [Export to CAD] button in PARTdataManager or Seamless
 , the view will switch to CAD and
the 3Dfindit placement dialog opens.
, the view will switch to CAD and
the 3Dfindit placement dialog opens.

The
buttons below for the confirmation of the placement are still
inactive. By clicking on  , you can cancel the placement action.
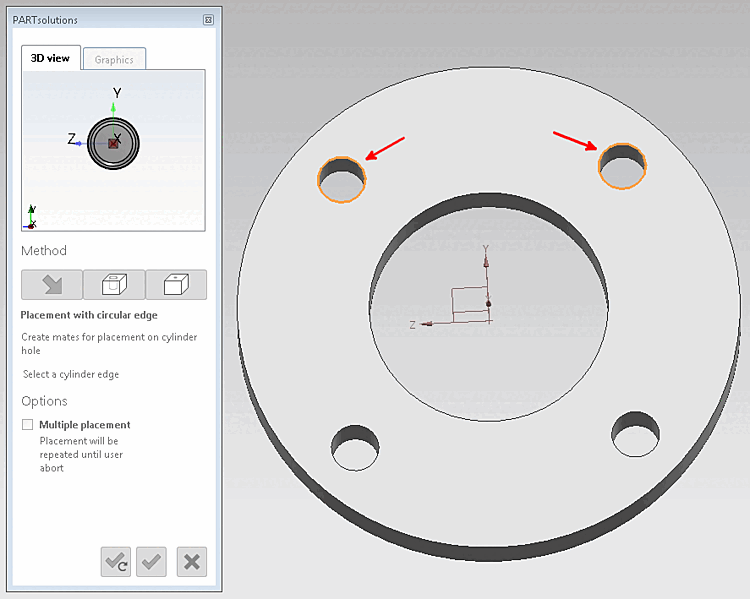
Click on the In cylinder bore [In Cylinder] button
 .
.-> The 3D view in the placement dialog now shows the possible connection points. (If several connection points are possible, corresponding information is displayed in the placement dialog)
-> In the placement dialog on the Graphics tab page, you will find 3D images of the component or technical views (if available).
Select an edge of the cylinder [Select a cylinder edge] (an element that clearly determines the placement position).
Multiple placement optionally: Simply select several cylinder edges (depending on CAD with or without Ctrl key).
Click on Place once
 or Place multiple times [Place multiple]
 .
.If a pattern is recognized, a query is automatically issued as to whether the part should be inserted in the pattern.
Place component [Place part]: Do you want to fill the pattern with instances? [Fill pattern with instances?]
Select the desired option and confirm by clicking on .
-> The bolt (or multiple) is placed in the hole.
Optionally make further placements or close placement dialog
Place multiple times [Place multiple] (and leave dialog open)
Place once (and close dialog)
Close dialog (without placement)
![Place component [Place part]: Do you want to fill the pattern with instances? [Fill pattern with instances?]](https://webapi.partcommunity.com/service/help/latest/pages/cn/partsolutions_user/doc/resources/img/img_6d6ef520481d49ea94c728a2094db2fa.png)
