Project files can be moved to any location within the directory tree.
Various methods are available for moving:
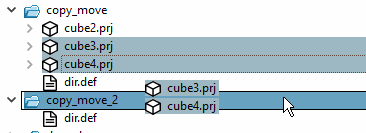
If you want to move several projects at once, select them beforehand by holding down the Ctrl key.
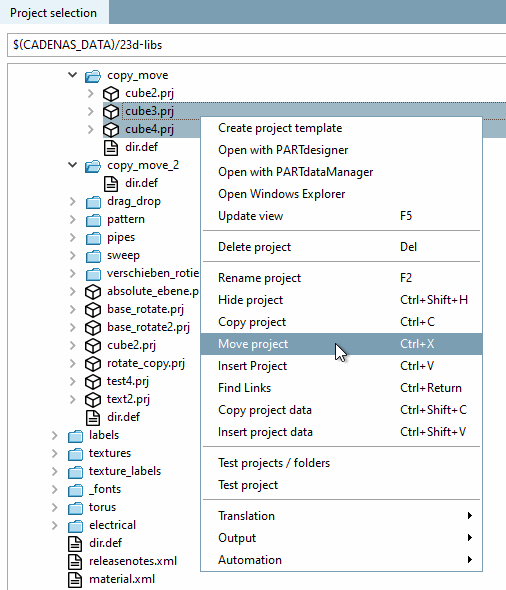
Select the desired project(s) and click on Move project.
Select the desired directory in which you want to insert the project(s) and click on Insert project.
If the projects are not part of an assembly, deactivate the option Adjust references in assemblies [Adapt links in assemblies] (if set).
![[Caution]](https://webapi.partcommunity.com/service/help/latest/pages/cn/partsolutions_user/doc/images/caution.png)
Caution If you move projects of an assembly, be sure to activate the option Adjust references in assemblies [Adapt links in assemblies] and enter the correct assembly path in the input field, otherwise the assembly can no longer be loaded without errors and you will have to enter all reference paths again manually. See Section 5.8.2.2.8, “Correct incorrect project assembly paths manually ”.
Please note that when moving the project, all paths that refer to the project lose their reference and must be adjusted manually (e.g. EOL, accessories ...).


Press the Shift key and hold it down during the drag & drop process.
Now drag the entire selection into the desired directory. You can recognize the move by the missing
 icon next to the mouse cursor.
The Move project dialog appears. See above.