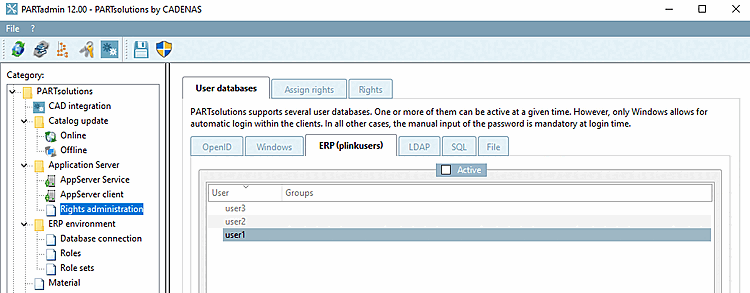
PARTsolutions supports several user databases. One or more of them can be active at a given time. However, only Windows allows for automatic login within the clients. In all other cases, the manual input of the password is mandatory at login time.
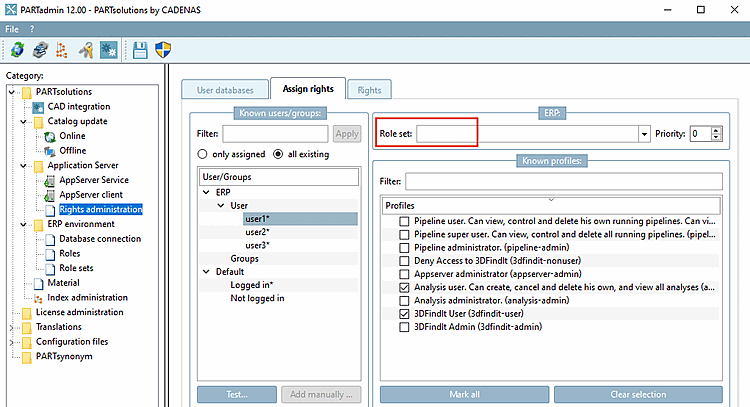
To display the users/groups on the Rights assignment [Assign rights] tab page, place a checkmark under Active on the corresponding tab pages. The order of the evaluation corresponds to the order of the tabs: Windows, then ERP, then the others...
Limit for queries: Maximum value is 999999.
Limitation can be helpful, on the other hand it can lead to incomplete results.
From a quantity of >9999 entries in AD at the latest, the search function under Rights assignment [Assign rights] -> Known users/groups will definitely no longer work reliably, but possibly even earlier, although this can be intercepted using the .. button.
In general the behavior strongly depends on the concrete AD server.
Microsoft Azure AD: Select Azure as the OpenId provider. If no explicit issuer is specified, the one in which the computer is integrated is used. If client secret is specified and the application has been assigned the necessary rights in the Azure portal, users and groups can also be read via the graph-api. [Choose Azure as the OpenId provider. If no explicit issuer is specified, the one in which the computer is integrated is used. If the client secret is specified and the application has been assigned the necessary rights in the Azure portal, users and groups can also be read out via the graph api.]
Other OpenID Provider: Any other Open ID provider (keycloak, etc...) Interactive listing of groups is not possible here. [Any other Open-ID provider (keycloak, etc...) Interactive listing of groups is not possible here.]
Issuer: This url specifies the path to the Openid provider realm or the Azure tenant. [This url specifies the path to the Openid provider realm or Azure tenant.]
Client ID/App ID [Client-ID/App-ID]: The application ID or client ID for 3Dfindit in the OpenId provider (AppId in the application registration of the Azure portal)
Client secret [Client-Secret]: The client secret that is stored in the app registration for this client. Can be omitted if no listing of users/groups via the graph api is required. Only relevant for Azure. [The client secret that is stored in the app registration for this client. Can be omitted if there is no need to list the users/groups via the Graph API. Is only relevant for Azure.]
Client redirect URI [Client-Redirect-Uri]: The redirect URI stored in the app registration that is to be used is entered here. If this field is empty, https://localhost/auth/login is used. This URI must then be permitted in the app registration. This entry is only intended for the mobile device and desktop applications platform. It is not used in the web application for 3Dfindit, but only for the login to PARTadmin or PARTdataManager. The URI entered here can be completely fictitious, as it is only relevant for the evaluation of the redirect from the OpenID provider. [The redirect URI stored in the app registration that is to be used is entered here. If this field is empty, https://localhost/auth/login is used. This URI must then be allowed in the app registration. This entry is only intended for the mobile device and desktop applications platform. It is not used in the web application for 3dfindit, but only for the login to PARTadmin or PARTdataManager. The URI entered here can be completely fictitious, as it is only relevant for the evaluation of the redirect from the OpenID provider.]
Scopes: Scopes required for authentication. Separated by spaces. The default is "openid offline_access" [Required scopes for authentication. Separated by spaces. The default is "openid offline_access"]
Username Claims: Comma-separated list of claims that should be considered as the source for the user ID. The default setting here is "unique_name,preferred_username,upn". [Comma-separated list of claims to be considered as the source for the user ID. The default setting here is "unique_name,preferred_username,upn"]
Group claim [Group Claim]: Name of the claim from which the group membership is to be extracted. The default is "groups" for Azure and "roles" for everything else. Can be changed to any other claim here. [Name of the claim from which the group membership is to be extracted. The default is "groups" for Azure and "roles" for everything else. Can be switched to any other claim here.]
Required group: Name of a group in which the user must be in order to be considered a valid user. If no entry is specified, all users are considered valid.
Checkbox: Determine additional attributes via the UserInfo endpoint [Identify additional attributes using the UserInfo endpoint] (Not relevant for Azure.)
Configuration of SSO via Microsoft Azure
Note: OpenID does not work in batch processes (therefore Windows must also be activated under user databases [User databases] ).
In the following you can find a detailed description, which has just to be modified for your own environment.
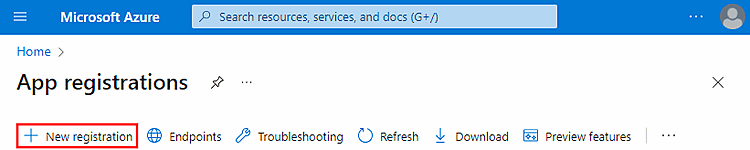
In the first step, create an app registration for CADENAS 3Dfindit in your company in Microsoft Azure.
Go to https://portal.azure.com.
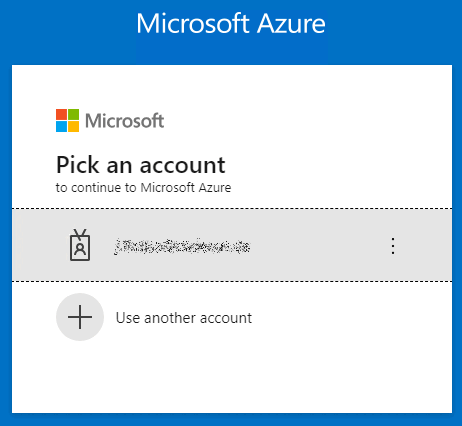
Pick an account in Microsoft Azure.
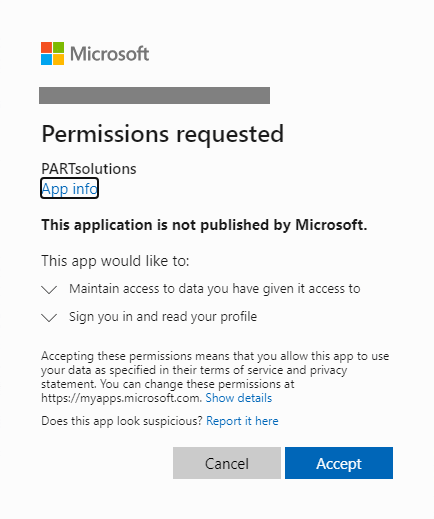
If API authorizations have been set, the following query also appears, unless an admin consent has been set for all users by the administration. Otherwise, each user must give their own explicit consent. See below.
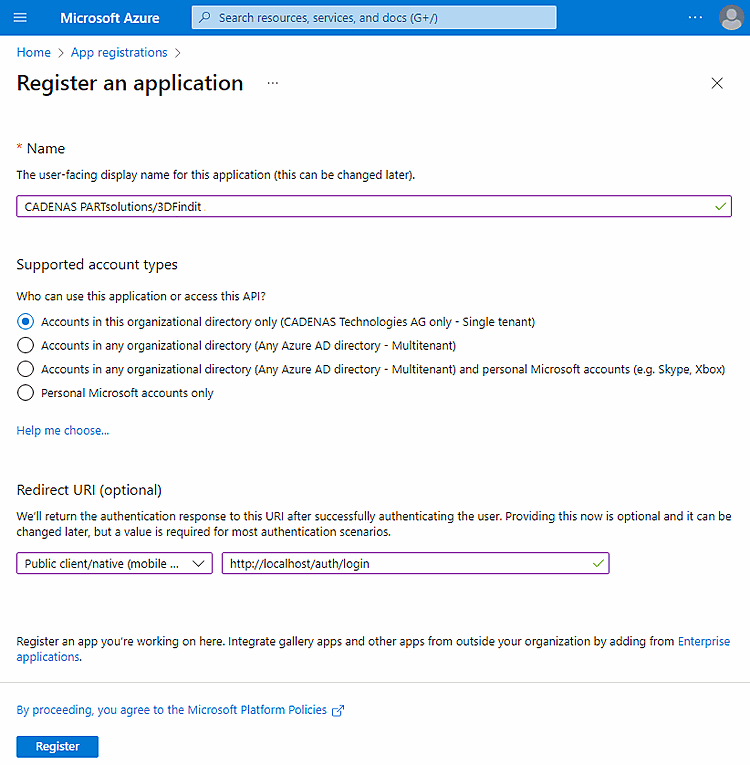
Complete the Register application dialog and then click .
Supported account types: Select the option Only accounts in this organization directory (only "<your company>" - single client) (in the exemplary figure "CADENASTechnologies AG"),
Redirect URI (optional): Select Public client/native (mobile and desktop) in the list field and enter http://localhost/auth/login in the input field.
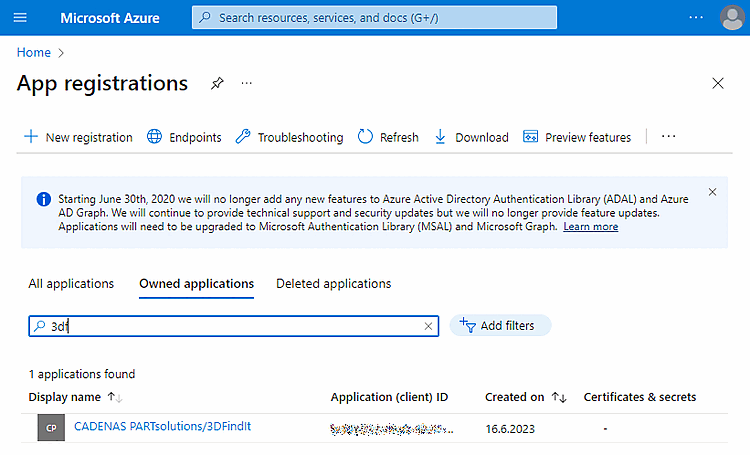
Filter for the just registered application.
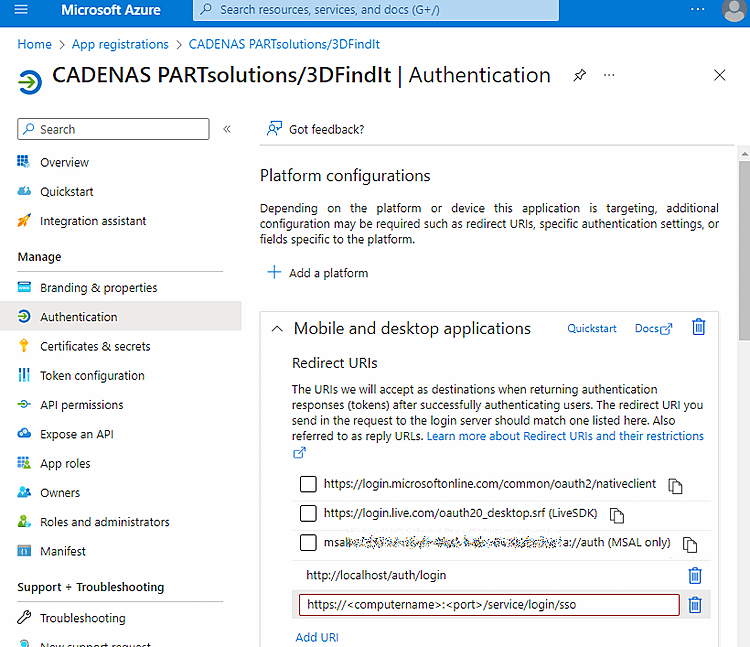
Select the Authentication item.
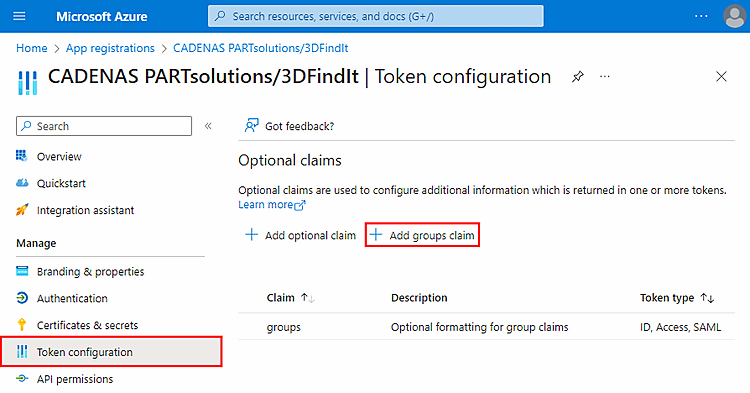
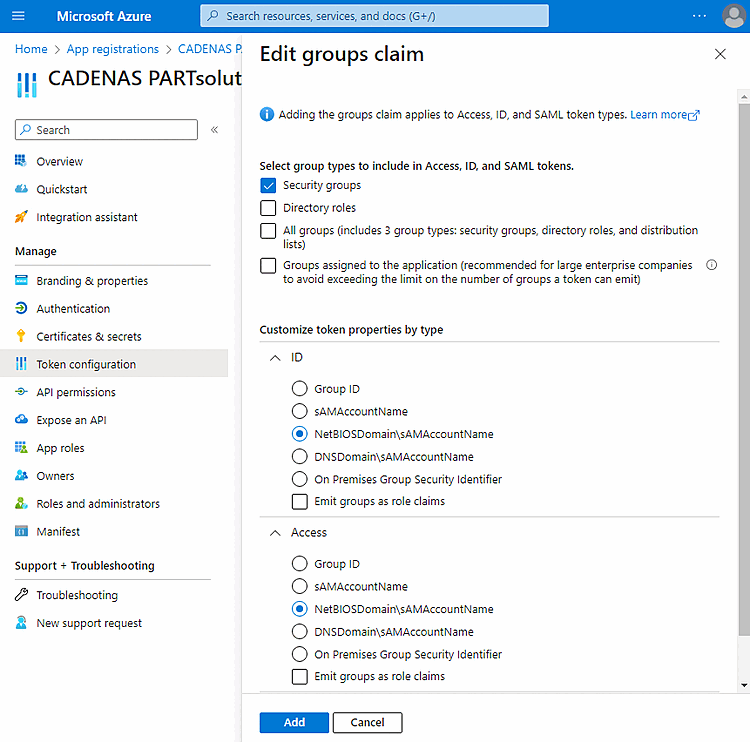
Select the item Token configuration and click on Add group claim.
Complete the Edit group entitlement dialog page as follows:
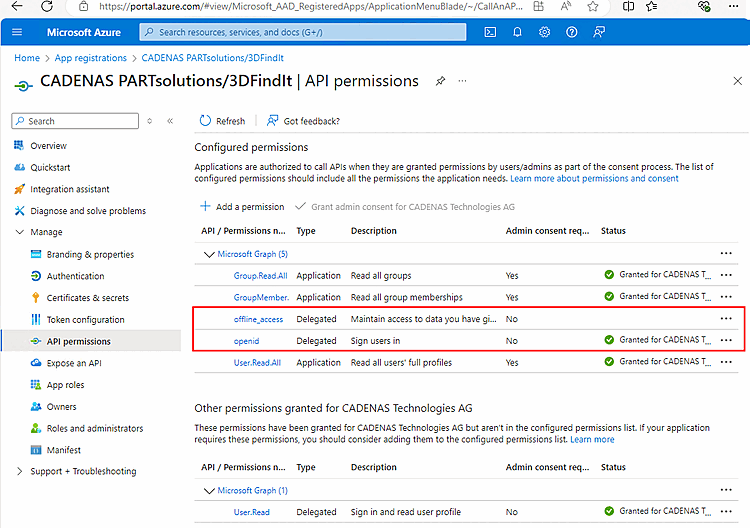
The following API authorizations must be set for the login to work:
The type must be set to "Delegated".
If Group.Read.All and GroupMember.Read.All and User.Read.All additionally set then within PARTadmin the users and groups can be can be listed. For pure authentication, this is not needed.
If you need to bypass the attribute size restriction for groups, proceed as follows:
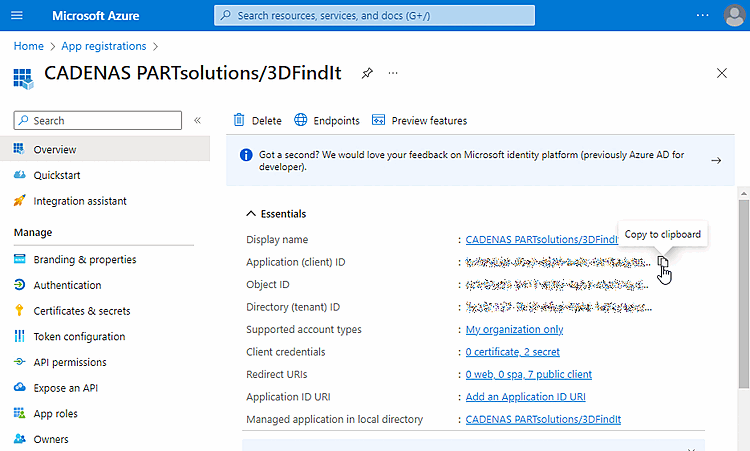
Open the summary. Here you can copy the desired IDs to the clipboard in order to paste them into PARTadmin.

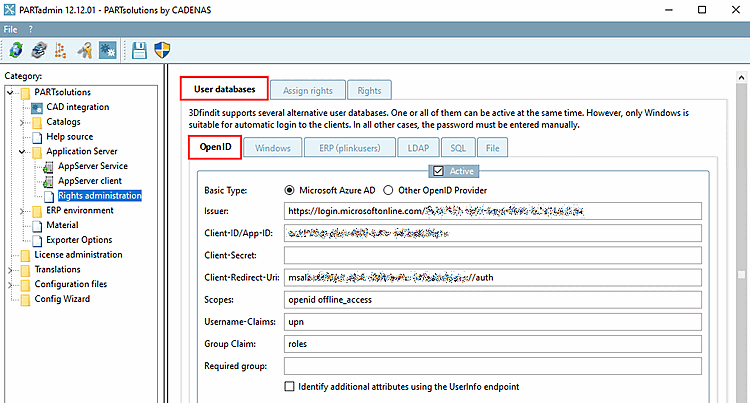
In PARTadmin, select the User databases tab page and the OpenID subpage under the Rights management [Rights administration] category.
Under Basic Type, select the Microsoft Azure AD option.
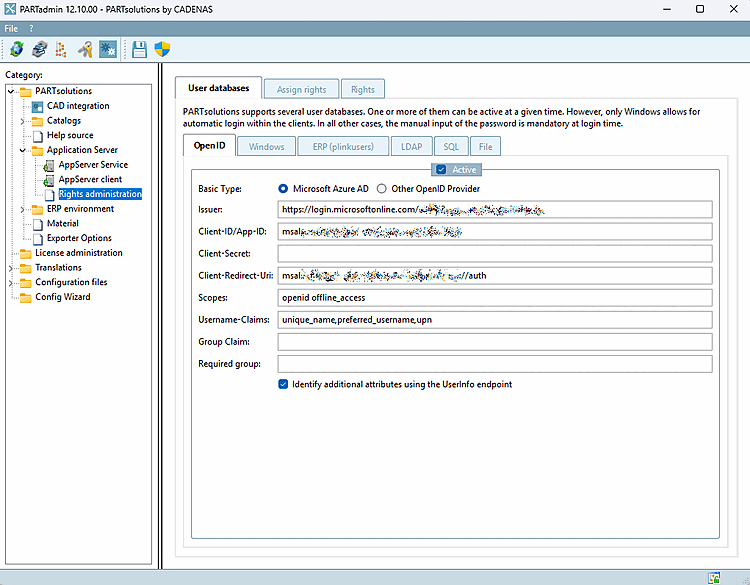
Fill out the individual fields according to the data from Microsoft Azure:
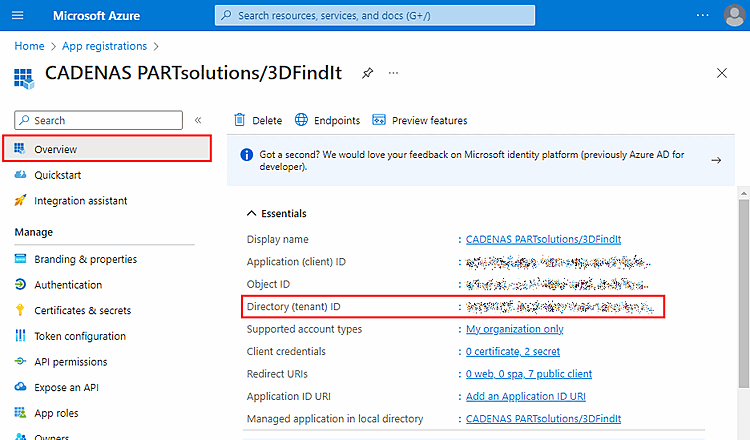
Issuer: This url specifies the path to the OpenID provider realm or the Azure tenant [This url specifies the path to the Openid provider realm or Azure tenant.]
https://login.microsoftonline.com/<Tenant-ID>/
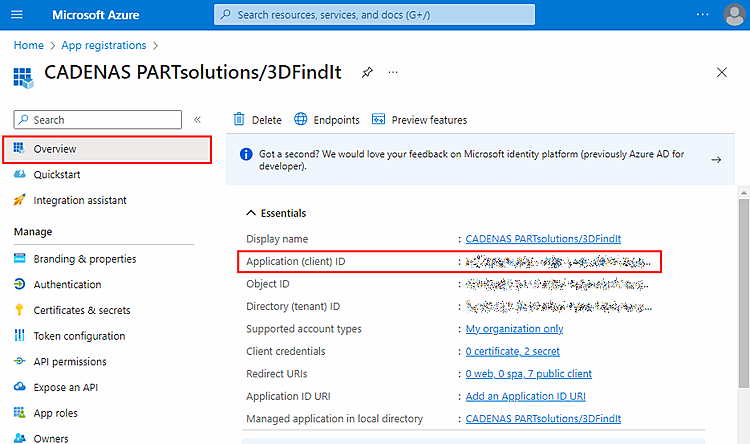
Client ID/App ID: The application ID or client ID for PARTsolutionsin the OpenID provider (AppId in the application registration of the Azure portal) [The application ID or client ID for PARTsolutions in the OpenId provider (AppId in the application registration of the Azure portal)]
Client secret [Client-Secret]: The client secret that is stored in the app registration for this client. Can be omitted if no listing of users/groups via the graph api is required. Only relevant for Azure [The client secret that is stored in the app registration for this client. Can be omitted if there is no need to list the users/groups via the Graph API. Is only relevant for Azure.]
The desired group can also be added manually by first using Test... to determine the correct group name. is used to determine the correct group name.
Normally, the option is not necessarily required unless the option Determine additional attributes via the UserInfo endpoint [Identify additional attributes using the UserInfo endpoint] is set.
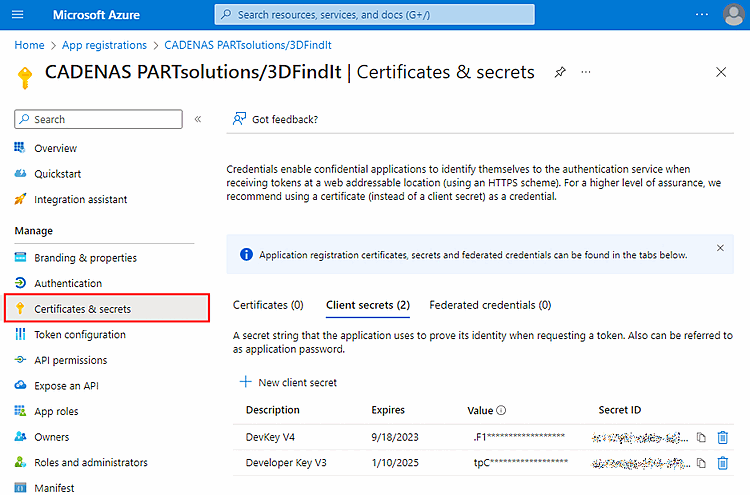
You can create and read IDs under Certificates & secrets.
Client-Redirect-Uri: If a client has problems setting up the OpenID, they should use this setting and the msal URI of their app registration page.
The redirect URI stored in the app registration that is to be used is entered here. If this field is empty, https://localhost/auth/login is used. This URI must then be allowed in the app registration. This entry is only intended for the mobile device and desktop applications platform. It is not used in the web application for 3Dfindit, but only for the login to PARTadmin or PARTdataManager. The URI entered here can be completely fictitious, as it is only relevant for the evaluation of the redirect from the OpenID provider. [The redirect URI stored in the app registration that is to be used is entered here. If this field is empty, https://localhost/auth/login is used. This URI must then be allowed in the app registration. This entry is only intended for the mobile device and desktop applications platform. It is not used in the web application for 3dfindit, but only for the login to PARTadmin or PARTdataManager. The URI entered here can be completely fictitious, as it is only relevant for the evaluation of the redirect from the OpenID provider.]
msa64992203d-d6b0-4900-c40c-641ba8c06e1a://auth
Scopes: Scopes required for authentication, separated by spaces. The default is "openid offline_access" [Required scopes for authentication. Separated by spaces. The default is "openid offline_access"]
Username claims [Username-Claims] (optional): Comma-separated list of claims that should be considered as the source for the user ID. The default setting here is "preferred_username,upn,email,sub" [Comma-separated list of claims to be considered as the source for the user ID. The default setting here is "preferred_username,upn,email,sub"]
Group claim [Group Claim] (optional): Name of the claim from which the group membership is to be extracted. Default is "groups" for Azure and "roles" for everything else. Can be changed to any other claim here [Name of the claim from which the group membership is to be extracted. The default is "groups" for Azure and "roles" for everything else. Can be switched to any other claim here.]
Required group: Name of a group in which the user must be in order to be considered a valid user. If no entry is specified, all users are considered valid [Name of a group in which the user must be in order to be considered a valid user. If no entry is specified, all users are considered valid.]
Determine additional attributes via the UserInfo endpoint [Identify additional attributes using the UserInfo endpoint]: Not relevant for Azure.
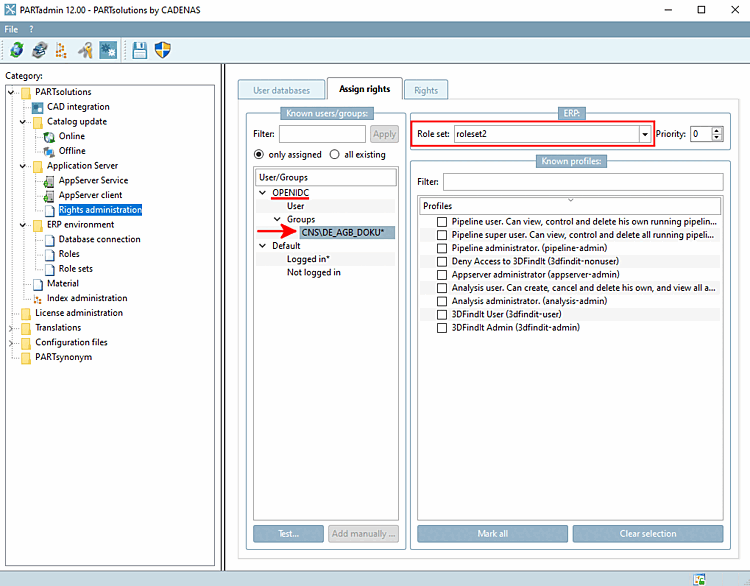
Open PARTadmin -> Rights management [Rights administration] category -> Rights assignment [Assign rights] tab page.
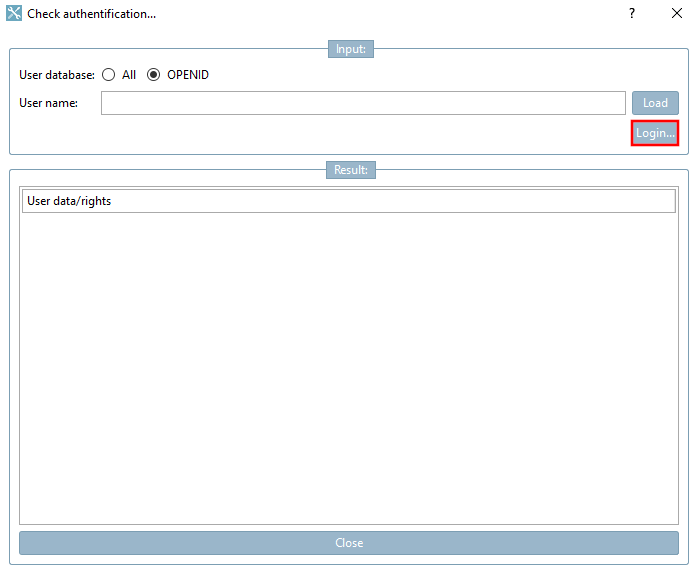
-> The Check authentication [Check authentification...]... dialog box opens.
Select the OPENID option and click Login.... [Login...]
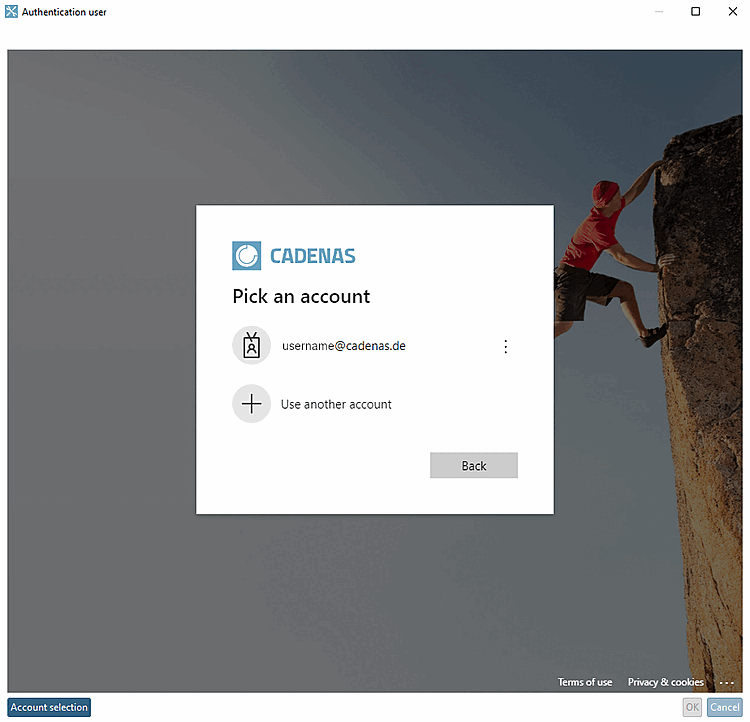
-> The Authenticate user dialog box opens.
Click on your account, enter your password and click .
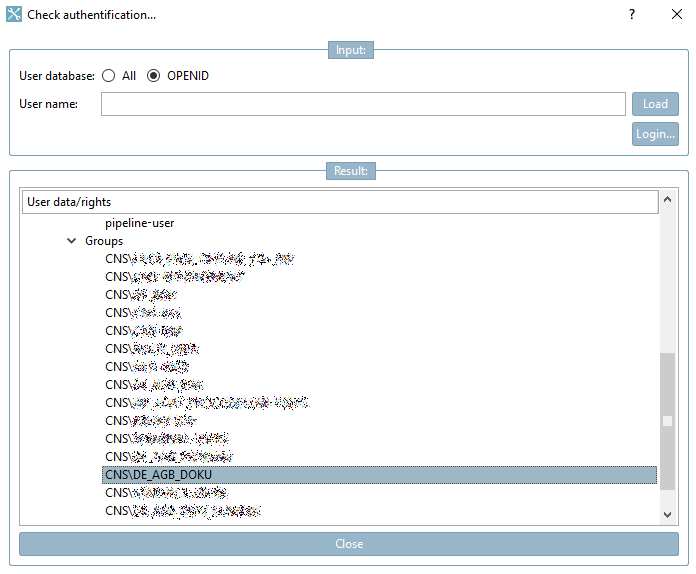
-> The data is displayed in the Result dialog area.
Select the entry User or Groups and click on
-> The Enter group [Enter group...]... dialog box opens.
Assign the desired role set to group or user.
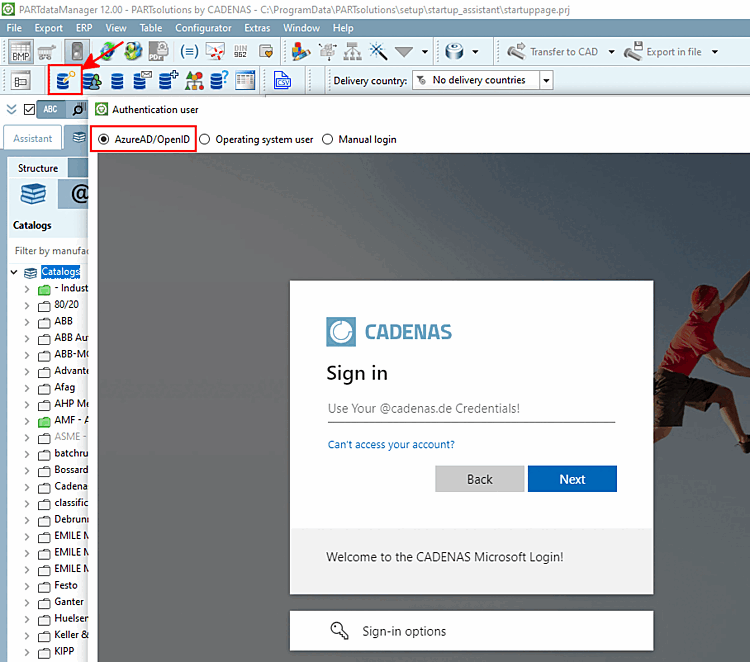
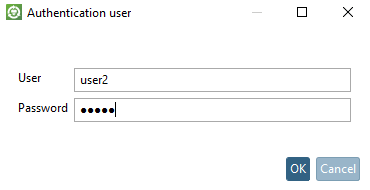
To test, start PARTdataManager and click on the Authenticate/change user [Authenticate/switch users] button.
-> The Authenticate user dialog opens.
![Rights assignment [Assign rights] " tab page](https://webapi.partcommunity.com/service/help/latest/pages/cn/partsolutions_user/doc/resources/img/img_24ad01f367024d11a9215c2ed5454a76.png)

![[Note]](https://webapi.partcommunity.com/service/help/latest/pages/cn/partsolutions_user/doc/images/note.png)
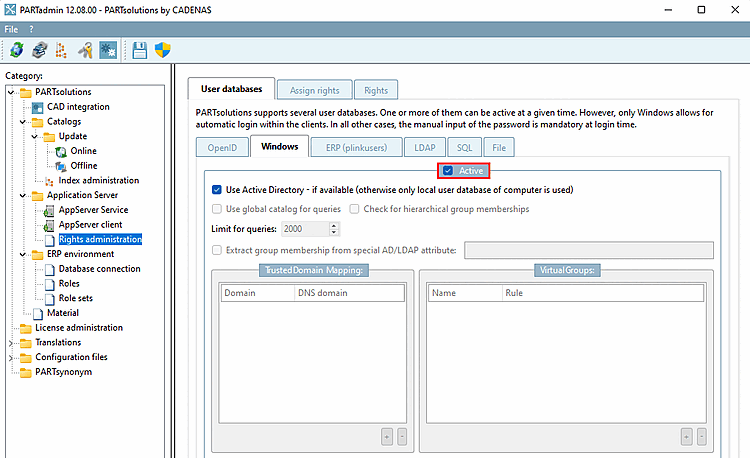
If a login via Windows user is to be possible (Autologin), the Active option must be activated on the Windows tab page.
The Active option is activated by default, which makes sense in the vast majority of cases.
If it becomes deactivated, a Windows-based user authentication is not possible.
Use Active Directory if available (otherwise only the local user database of the computer is used) [Use Active Directory - if available (otherwise only local user database of computer is used)]:
In Azure-ID / Entra-ID scenarios, computers may not be able anymore to resolve AD-Users via access to the AD-Controller (even if they are still joined to a domain).
In such situations it is not recommended attempting to resolve users via AD.
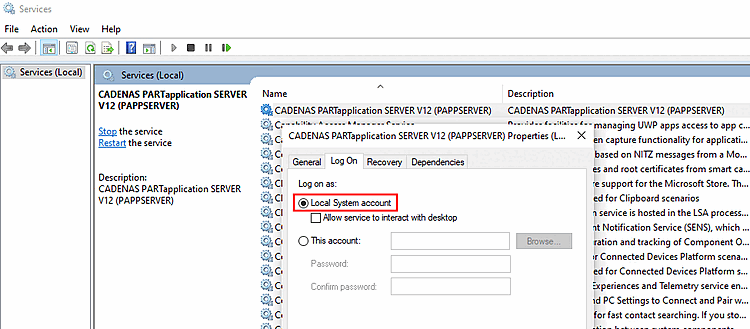
This option allows you to deactivate AD searches. The local user database remains usable as the server may be running as a local user account.
Use global catalog for queries: Activate the option for an Active Directory forest (default is "off")
Limitation for queries [Limit for queries]: Please make sure that no 0 is entered!
This happens when you remove the checkmark Active for Windows, then close and restart PARTadmin and then reactivate the user database "Windows".
Take nested group memberships into account [Check for hierarchical group memberships]: The evaluation is carried out recursively via hierarchically higher levels.
![[Tip]](https://webapi.partcommunity.com/service/help/latest/pages/cn/partsolutions_user/doc/images/tip.png)
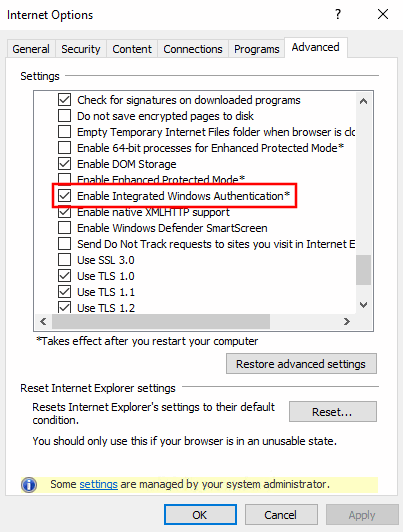
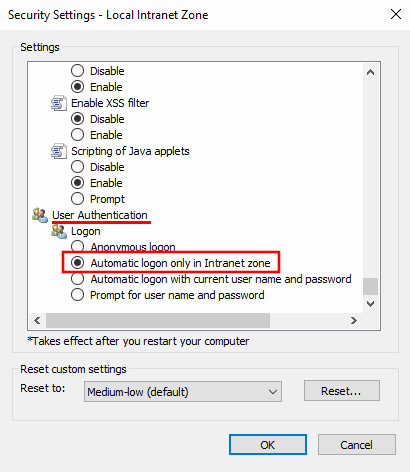
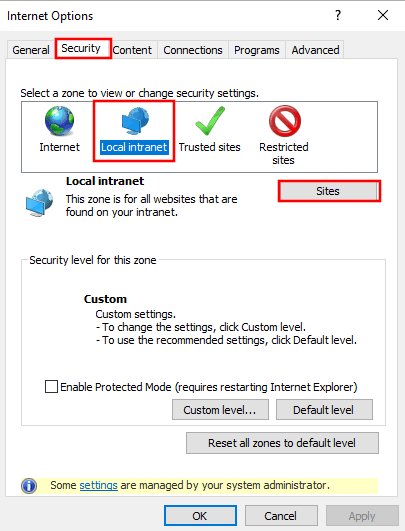
If there are problems with the autologin in PARTapplicationServer via Windows user name, please check the following basic settings:
In the dialog "Internet options" -> tabbed page "Advanced", the option "Enable Integrated Windows Authentication" needs to be enabled.
In the dialog "Security Settings - Local Intranet Zone" the option "Automatic logon only in Intranet zone" has to be enabled.
The http address of the Appserver has to be included in the local Intranet zone.
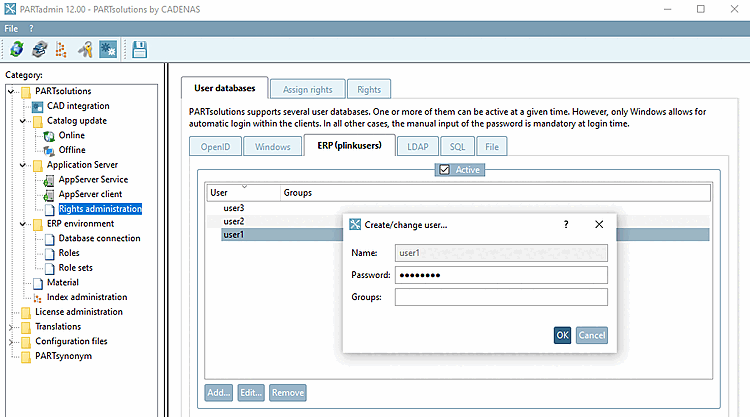
If login with ERP users is to be possible in the User authentication dialog, the Active option must be activated (default).
For Investing
admin rights are required from users. To achieve this,
click on the button at the top of the toolbar  Start the program with
Administrator privileges new [Restart the program with administrative privileges].
Start the program with
Administrator privileges new [Restart the program with administrative privileges].
Create users via the ... button. button. Enter a name [Name] and password [Password] in the dialog. If you want to change the password later (via ), simply set a new one (the old one will not be displayed).
If the above requirements are met, user authentication can be carried out in the Authenticate user dialog with user and password entry.
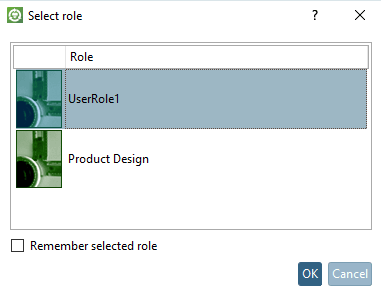
If several roles are available, the Select role dialog box opens.
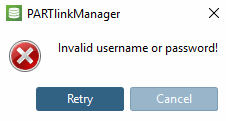
If no user can be authenticated, the error message Invalid username or password! appears: