Provide the required preview images in the directory structure.
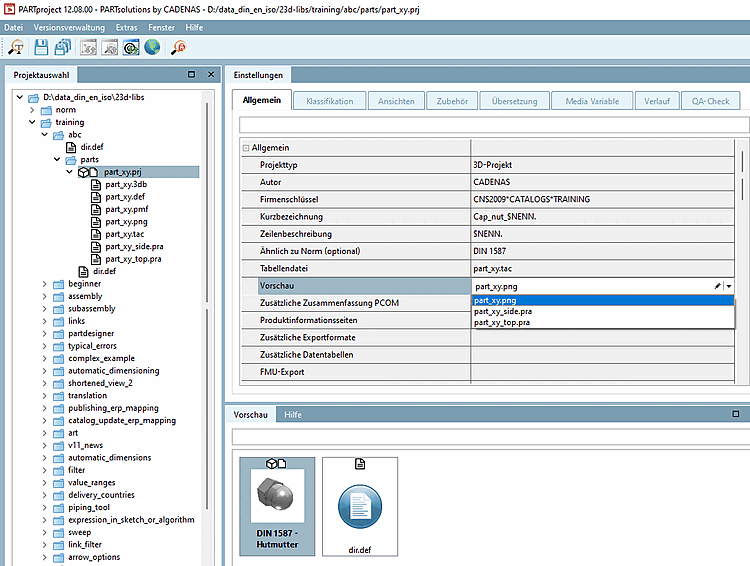
Select the desired project and set the desired preview image in the list field under Settings -> General tab -> Preview.
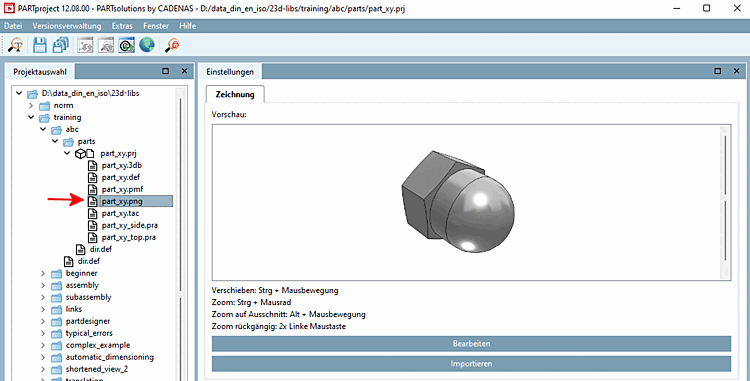
→ Only now is the preview image displayed in the PARTproject directory structure.
→ In the Edit project dialog area, the preview image of the component is displayed under Preview.
Optional, if you want to replace the preview image with another one:
Click on the button and select the new preview image in the Explorer.
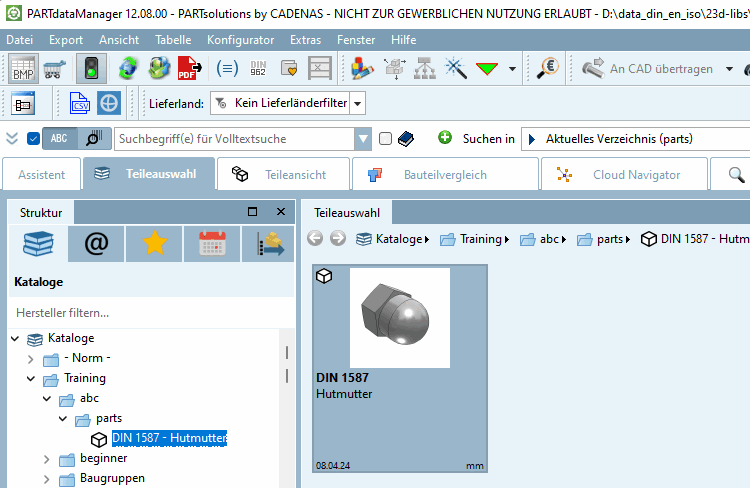
→ In PARTproject, the preview image of the cap nut has now been replaced. The preview shows the corresponding representation.
→ Later, when the project is called up, the corresponding preview image appears in the PARTdataManager parts view:[14]
![[Note]](https://webapi.partcommunity.com/service/help/latest/pages/cn/partsolutions_user/doc/images/note.png)
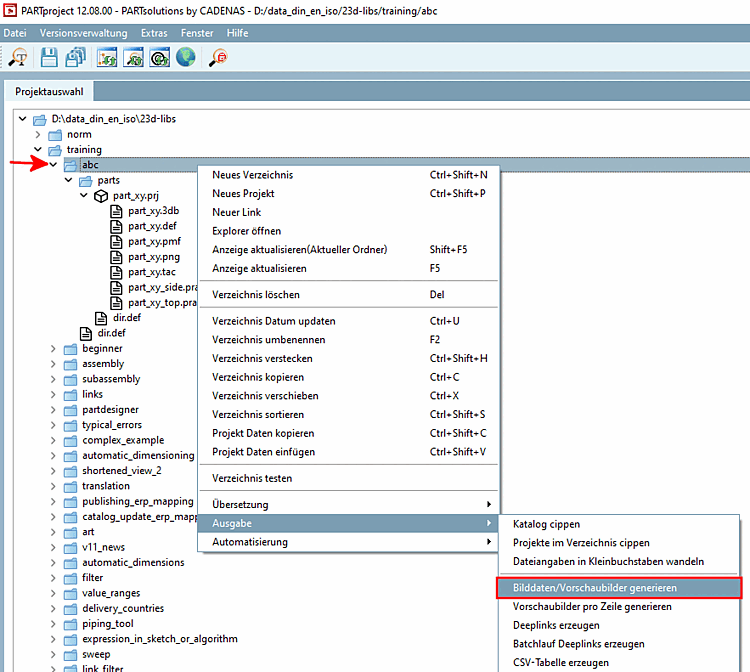
Note The preview images can be created automatically using the context menu command Generate [Generate image data/preview images] image data/preview images. See Section 5.8.2.1.19.4, “ Generate image data/preview images in batch run ”.