 |
With the help of the following example you can comprehend the use of a conical thread.[101]
Determine thread start, thread end and material side by clicking into the respective area.
-> Once the three steps have been performed, the respective dialog box is opened.
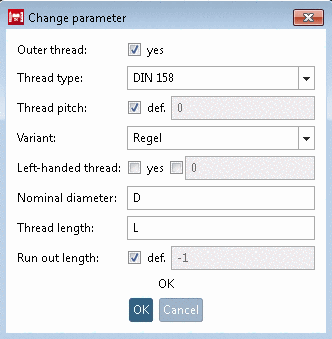
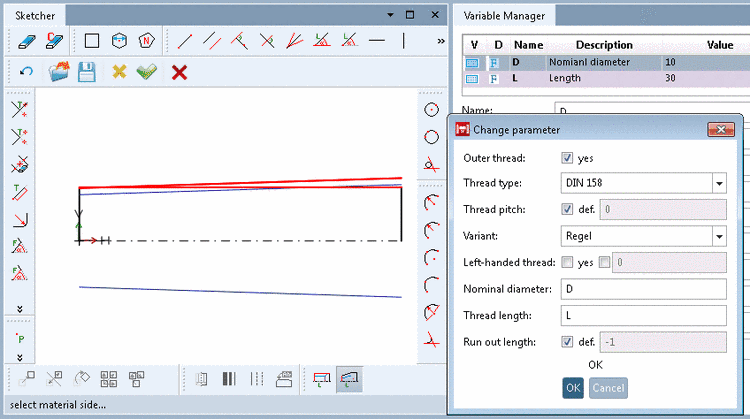
Adjust the values in the dialog box Change parameter as desired and confirm by clicking .
Outer thread: The checkbox is already activated or deactivated according to previous selection.
By default, the checkbox def. is set. A regular thread is created according to the set Standard.
If you want to create a fine thread with a defined thread pitch, deactivate the checkbox and enter the variable name for the thread pitch (e.g. 'P').
![[Note]](https://webapi.partcommunity.com/service/help/latest/pages/cn/partwarehouse/doc/images/note.png)
Note For a fine thread, in the table, the respective variable for the thread pitch must be applied!
On this also see Section 7.9.3.13.1.1.2, “Different pitches and derived automatic calculations for e.g. Row Label and Core diameter ”.
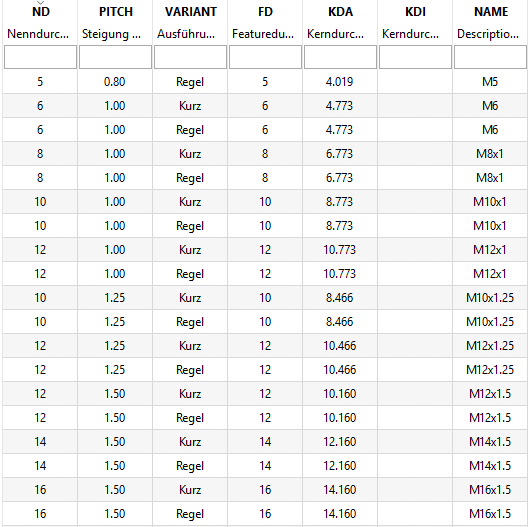
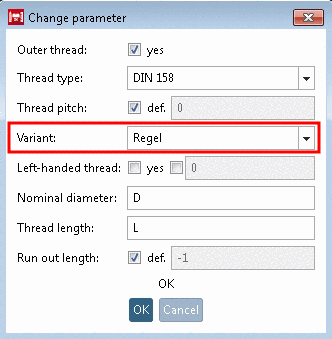
Is used for specific threads and enables further specification. Here in this example, DIN 158 has been used. Either enter "Regel" or "Kurz".
Note If the option exists in the thread table, the value has to be set.[a]
For example, DIN 158 uses the values "Regel" and "Kurz" as variant.
[a] If the option exists, the values should be offered in the list field. However, you can manually take the desired value from the thread table under
$CADENAS_DATA\datasetup\threadsand enter it manually.If the second checkbox is activated, you can carry out the query of whether left or right thread through the table as well. In this case, enter the respective variable name into the input area.
Run out length: When activating the checkbox, the run out length is automatically calculated, otherwise you also can specify a variable.
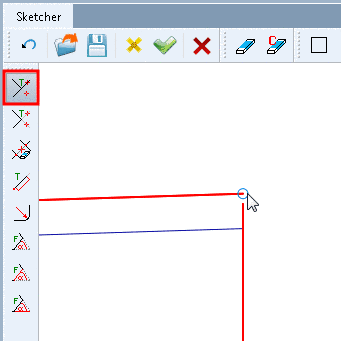
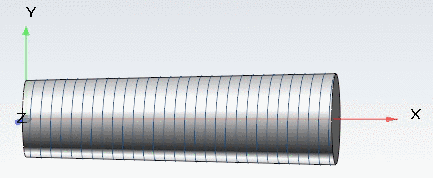
Once the decisive values have been correctly set, the thread is shown in the sketch.
You can further adjust values and immediately see the changes in the sketch.
If needed, trim the lengthened edge.
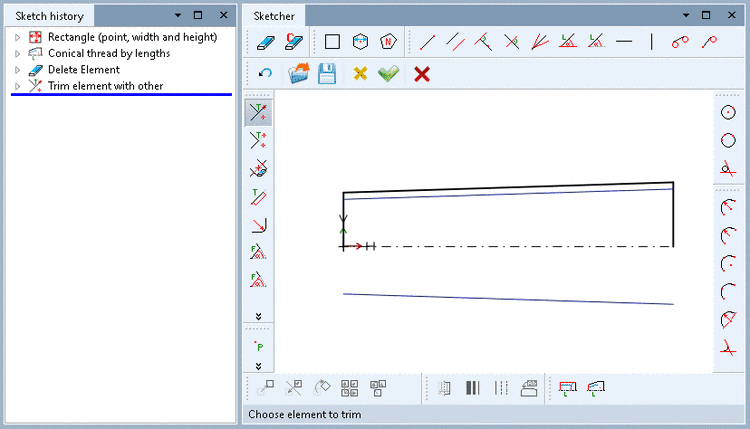
The thread is automatically marked as a cosmetic element (blue lines).
![[Important]](https://webapi.partcommunity.com/service/help/latest/pages/cn/partwarehouse/doc/images/important.png)
[101] With
installed training catalog, an example can be found under $CADENAS/Training/PARTdesigner/Threads/conical_thread.prj.