
- 2.1.10.1. 2D view" dialog box
- 2.1.10.2. "Select view to be transferred..." dialog box
- 2.1.10.3. Exporting the 2D drafting
- 2.1.10.4. Context menu and buttons "" window
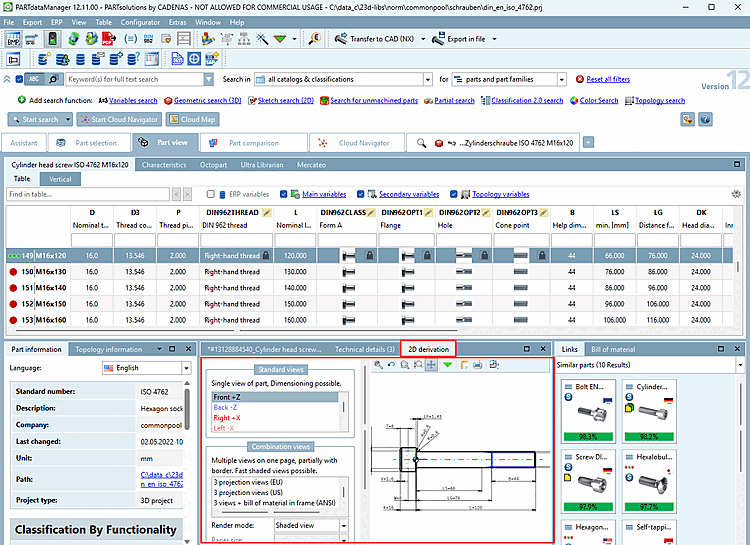
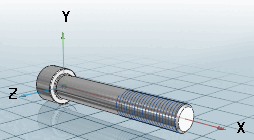
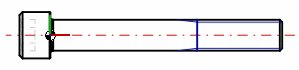
To be able to insert 3D components/assemblies from 3Dfindit into a 2D CAD system, you must create a 2D derivation of the 3D object.

To select the desired 2D derivation, depending on the setting options (Tools [Extras] menu -> Settings... -> Transfer to CAD [Export to CAD] )[97] two different dialog boxes are used:
2D view dialog box (details at Section 2.1.10.1, “ 2D view" dialog box ”)
(Corresponding setting option: Transfer active 2D derivation if 2D window is open, otherwise transfer the 3D model [Export selected 2D derivation view if 2D window is open, else export 3D model] or a default derivation ) (default setting )
Call up of the dialog box happens via:
Select the desired view in the 2D view dialog box and then export it using :
![[Note]](https://webapi.partcommunity.com/service/help/latest/pages/cn/partsolutions_user/doc/images/note.png)
Note This variant offers various functions such as the dimensioning mode [Dimensioning mode] [a] are available. For more information, see Section 2.1.10.4, “Context menu and buttons "2D view" window ” and Section 2.1.10.1.5, “Add dimensioning in PARTdataManager before the export ”.
[a] Create your own dimensions before transferring to the CAD system
Select view to be transferred [Choose view to pass...] dialog box... (Details at Section 2.1.10.2, “ "Select view to be transferred..." dialog box ”)
(Corresponding setting option: Always ask if several options are available [Always ask, if more than one alternative exists] )
For 2D CAD systems or CAD systems with the 2D option, clicking on the
 Transfer to CAD button, the Select view to be transferred [Choose view to pass...]... dialog box opens. regardless of whether the 2D view dialog box (opened using the
  2D derivation ) is open and the settings in this dialog always have priority.
Note If you like to transfer special views (not one of the standard views such as "Front", "Back", etc.) or technical views to the CAD system, then select this variant.
See Section 2.1.10.1.6, “Transfer special derivations or technical views to CAD system ”.
![PARTdataManager -> Extras menu -> Settings [Settings...]..](https://webapi.partcommunity.com/service/help/latest/pages/cn/partsolutions_user/doc/resources/img/img_bc50619b0dba4e91a7a3b97a5f988b8d.png)